Read Time: 7 minutes
Introduction: Why the Right Tools Matter for Rooftop Paver Pedestal System Installation
Installing pavers on pedestals goes much smoother and cuts labor costs with the right set of tools. Make installation less backbreaking and ensure a beautifully finished patio with this guide. Here is a list of tools that will help you ensure that your rooftop concrete paver patio looks great and lasts for years to come.
Tools for rooftop paver pedestal system installation:
- Setting up your paver pedestal layout and measuring for pedestal heights
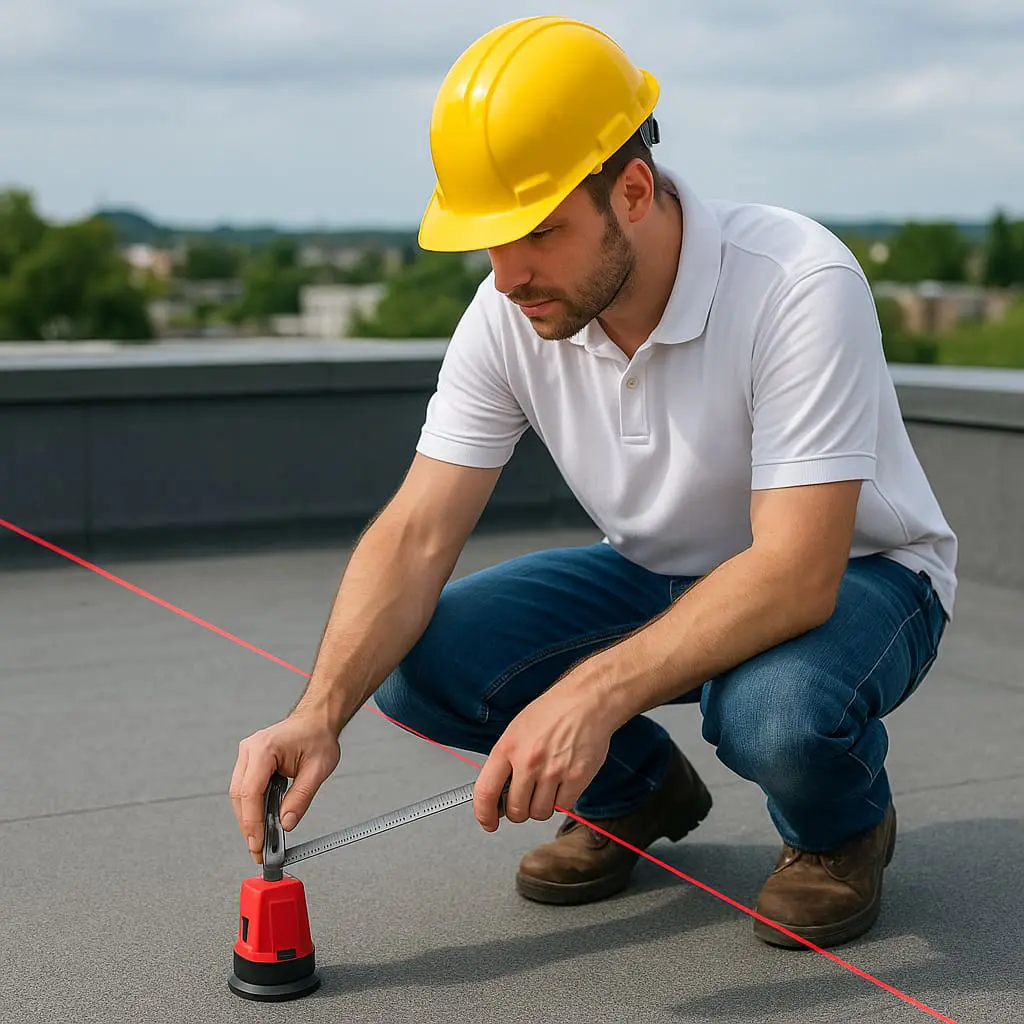
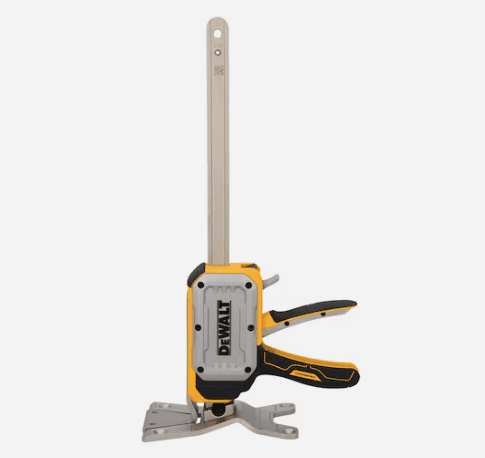
String line or Laser Level
Using a String Line or Laser Level for Accurate Measurements
You will want to use a string line or laser level for a few different tasks throughout your project. First, in order to place an order, you will need to take measurements to know what height pedestals you’ll need to use. Most pedestal systems are adjustable up to a few inches, but your project will likely need more than one height range of pedestal in order to maintain a level paver surface. To take measurements for pedestal heights, you will need to run a string line at the height of the lowest door threshold and measure up to that line at all of the high and low points across the roof.
Setting Up Guide Lines for Straight Paver Rows
Once you begin installation of your pavers, you will want to set a string line to set both your height and to provide a straight line. Use that string to help keep pavers level and straight as you lay your first row. You may want to run another string line perpendicular to your first row of pavers or up against any uneven walls, planters, fire pits or other obstacles that you will need to cut pavers up to. Due to the importance of the string line or laser level, this is one of the most essential tools for rooftop paver pedestal system installation.
2. Cutting Pavers at Perimeters
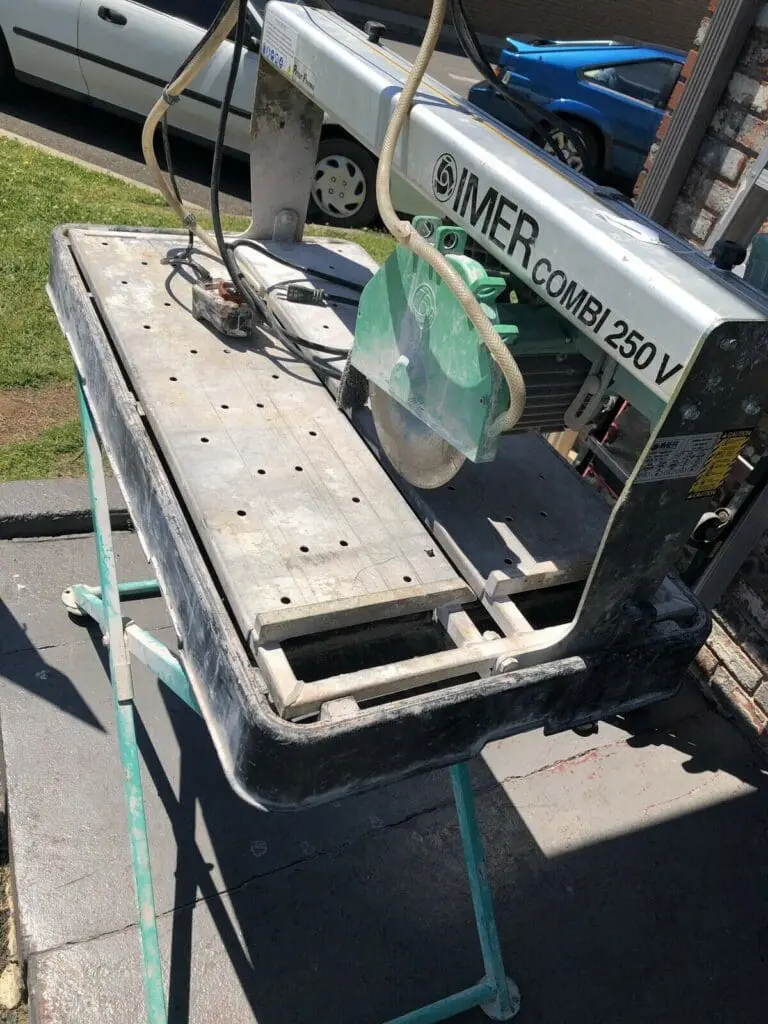
Wet Table Saw
A wet table saw has a few advantages – cuts will be perfectly straight every time, it creates minimal dust and can be used by less experienced paver installers. Although, it does take more time in the field to set each paver up on the table to make each cut. You also won’t be able to make small cuts or notches in the pavers with this saw. So, the following saws are also recommended tools for rooftop paver pedestal system cutting that you’ll want to have in your truck.
Handheld Cut-off Saw
For more experienced paver installers, a handheld cut-off saw, also known as a power saw, will be a faster way to cut in the field. This tool requires a steady hand to ensure straight cuts, but it can make smaller, more precise cuts and notches.
Grinder
For very small cuts, a grinder works best. For example, this can be used in situations when you have stone façade that sticks off the building and pavers need to be cut a little bit to fit around them.
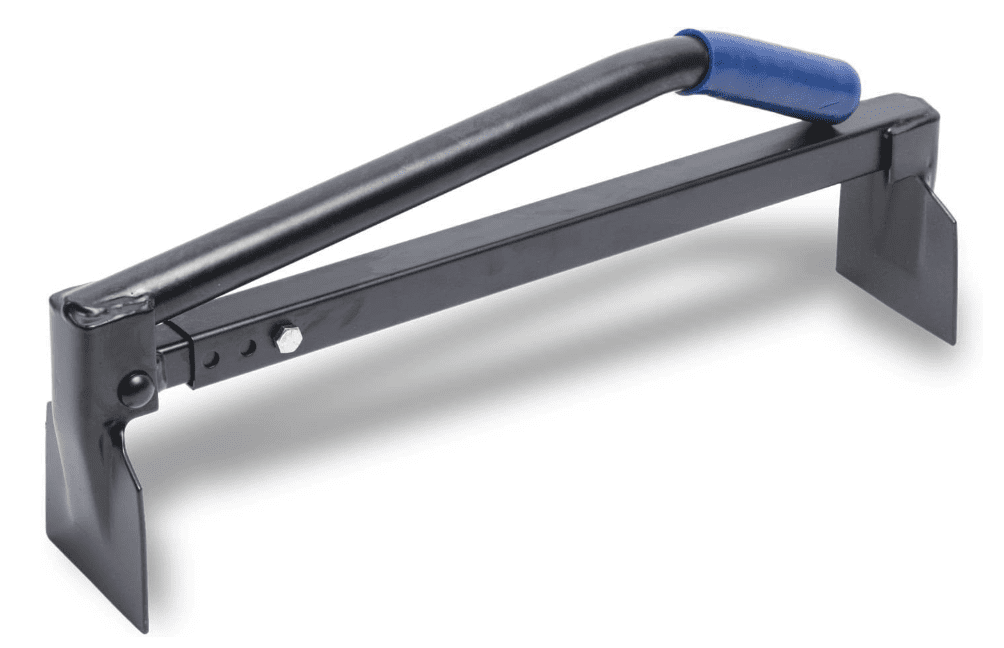
Slab Grabber Tool
A slab grabber is a tool used specifically by paver and brick installers. It’s basically a clamp that can grab pavers up to 24” wide with a handle that allows you to pick them up with one hand. The clamps are very thin and designed to fit in the gap between pavers that are already installed. So, this is a fantastic tool to lift pavers for routine maintenance on the roof below.
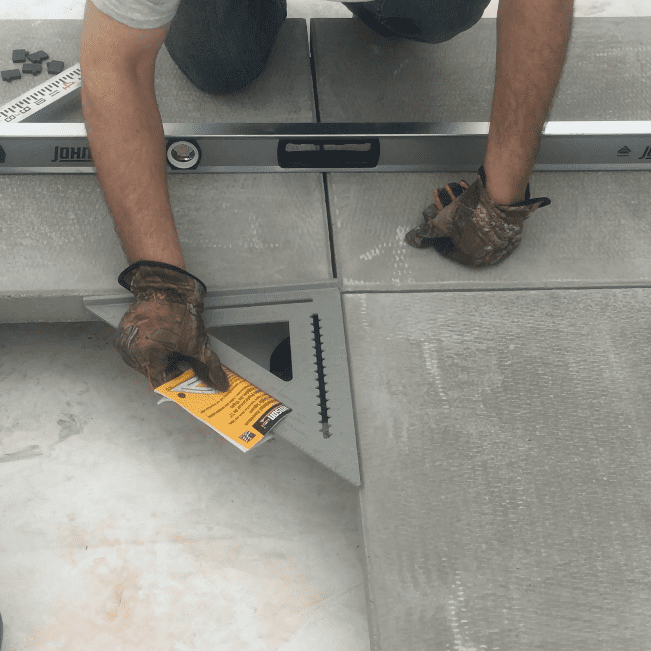
4. Keeping Pavers Square as They Are Laid
Framing Square (90 Degree Angle)
A framing square can be placed in the corner of pavers after they’ve been installed to make sure they’re perfectly square. Even if your pavers are level, this tool will ensure that each new row won’t slowly drift out of line. If you fail to ensure square rows, before long the pattern will look curved, the joints won’t match, and the whole paver area will seem crooked.
5. Gently Adjusting Pavers
Rubber Mallet
If a paver isn’t perfectly straight or square, use a rubber mallet to tap it over on the pedestal without damaging the paver.
6. Leveling Pavers
Bubble or Laser Level
After you lay each paver, set a level over that paver and the ones adjacent to it in order to ensure they are all level with one another.
7. Supporting Pavers While Placing Pedestals
Construction Jack
This tool is underutilized but can save lots of time in the field. Once you level your first paver, you can set your second paver on the two shared pedestals. Then set the construction jack under the other side of the paver. Put your level on top of that paver and jack up that side of the paver until it’s level. Then slide your pedestals under the corners and adjust them up to the height of the jack.
8. Transporting Pavers Across Roof
Furniture Dolly
Use a dolly to take pavers from the pallets over to where they are being laid. This should allow you to keep your pallets out of the way and prevent having to move pavers twice.
Conclusion: Save Time, Money, and Labor with the Right Tools for Rooftop Paver Pedestal System Installation
Using proper tools for rooftop paver pedestal system installation is crucial for a successful outcome. Proper measurement, straight and level pavers, precise cuts, worker safety, and faster installation will save your company time and money.
FAQs About Paver Pedestal Installation Tools for Rooftop Paver Pedestal System Installation
Q1: Can I install pavers on pedestals without professional tools?
A1: No, having the right tools will ensure the rooftop pavers are installed correctly, the work is faster and easier and helps you get better results. Tools like a level, saw, and slab grabber can save you time and help avoid costly mistakes.
Q2: How do I figure out the right pedestal heights for my patio?
A2: The easiest way is to use a string line or laser level to measure the height difference across your surface. Start from the lowest door threshold and measure up from there to the high and low points on your roof or ground.
Q3: What’s the best tool for cutting pavers?
A3: A wet saw gives you clean, straight cuts with minimal dust—great for beginners. But if you need to make detailed cuts or work faster, a handheld cut-off saw and a grinder will speed things up and allow for smaller, more intricate cuts.
Q4: How do I make sure my rooftop pavers are level and straight?
A4: Use a bubble level or laser level as you lay each paver. Also, running a string line can help guide your layout so everything stays even and aligned.
Q5: Can I lift a paver once it’s installed without damaging the others?
A5: Yes! A slab grabber tool is perfect for this. It slides between pavers and lets you lift one without messing up the surrounding ones. Super handy for maintenance or adjustments.
Quick Summary: Must-Have Tools for Rooftop Paver Pedestal System Installation
- String Line or Laser Level – For accurate height measurements and straight paver alignment.
- Wet Table Saw – Delivers clean, dust-free, straight cuts—great for beginners.
- Handheld Cut-Off Saw – Ideal for quick, detailed field cuts by experienced installers.
- Angle Grinder – Perfect for tight notches and precise adjustments.
- Slab Grabber Tool – Easily lifts individual pavers without disturbing others.
- Framing Square – Ensures 90-degree accuracy when placing or checking paver angles.
- Rubber Mallet – Safely taps pavers into perfect position without damage.
- Bubble or Laser Level – Confirms each paver is level with its neighbors.
- Construction Jack – Temporarily supports and levels pavers during installation.
- Furniture Dolly – Effortlessly moves pavers across rooftops or large areas.
**If you are in need of a ballpark quote, we have a paver pedestal calculator on our website that can help estimate the quantity of pavers and pedestals needed for your project. These calculations assume a 10% waste factor for pavers and a 5% waste factor for pedestals. So, you will also need to get a more accurate quote by following the steps for measuring paver pedestal heights in this article prior to placing an order.


