5 Mistakes Architects Make When Specifying a Rooftop Pedestal System
An Architect’s Guide to Designing Rooftop Patio Systems That Install Smoothly, Perform Reliably, and Stand the Test of Time
Quick Answer: What are the biggest mistakes architects make when specifying rooftop pedestal systems?
The biggest mistakes architects make when specifying rooftop pedestal systems are selecting materials before understanding the roof, overlooking drainage, delaying pedestal height planning, ignoring wind uplift requirements, and choosing a pedestal system without considering installation speed, labor cost, and long-term roof access.
- Not understanding the roof before selecting the system
Confirm roof load capacity, membrane type, insulation, slope, drains, thresholds, parapets, and rooftop equipment before choosing concrete pavers, porcelain pavers, Ipe deck tiles, turf, or pedestal components. - Ignoring drainage and water management
A rooftop pedestal system should allow water to pass through the finished surface, flow across the roofing membrane below, and continue to the roof drains as designed. - Leaving pedestal height planning until construction
Roof slope, drains, crickets, saddles, thresholds, parapets, and finished elevations all affect pedestal heights and should be studied during design. - Leaving wind uplift requirements until construction
Wind uplift requirements should be reviewed before bidding, especially at roof edges and corners, where uplift pressures are typically higher. - Specifying a pedestal brand without considering installation speed and labor cost
Pedestal selection affects labor, ordering, installation speed, field coordination, roof access, and long-term maintenance.
Bottom line: Better rooftop pedestal specifications start with better information about the roof, drainage, finished elevations, wind conditions, installation requirements, and future roof access.
Key Terms for Rooftop Pedestal Systems
Rooftop pedestal system
An elevated rooftop surfacing assembly that uses adjustable or stackable pedestals to support pavers, deck tiles, turf grates, or other walking surfaces above a roofing membrane.
Adjustable pedestal
A height-adjustable support used to create a level finished surface over a sloped roof.
Stackable pedestal
A low-height pedestal or spacer system used where the finished patio elevation is too low for a standard adjustable pedestal.
Roofing membrane
The waterproofing layer of the roof assembly. In a rooftop pedestal system, the membrane remains the waterproof surface while the pavers, deck tiles, turf, or other finish materials create the walking surface above it.
Roof assembly
The complete roof construction below the patio surface, including the structural deck, insulation, tapered insulation, protection board, waterproofing membrane, and related roofing components.
Structural load capacity
The amount of weight the roof structure can safely support. This should be verified before selecting heavy rooftop surface materials such as concrete pavers.
Dead load
The permanent weight added to the roof by pavers, pedestals, protection pads, accessories, planters, furniture, and other fixed rooftop materials.
Roof slope
The pitch of the roof surface that directs water toward roof drains. A rooftop pedestal system creates a level walking surface above the sloped roof.
Drainage path
The route water follows across the roofing membrane to reach roof drains. A properly designed pedestal system should not block or redirect this path.
Roof drain
A drain that removes water from the roof. Roof drains should remain accessible after a rooftop pedestal system is installed.
Drain access
The ability to remove pavers or other surface materials so maintenance personnel can inspect, clean, or service roof drains.
Finished patio elevation
The final height of the rooftop walking surface after pavers, pedestals, deck tiles, turf, or other materials are installed.
Pedestal height
The height required for each pedestal to support the finished patio surface at the correct elevation. Pedestal heights often vary because roofs slope toward drains.
Pedestal height planning
The process of reviewing roof slope, finished elevations, drain locations, thresholds, parapets, and edge conditions to determine the correct pedestal height ranges before installation.
Door threshold
The transition point at an exterior door where the interior floor meets the rooftop patio. Threshold height affects accessibility, waterproofing, drainage, and finished patio elevation.
Threshold height
The vertical distance between the roof surface or finished patio surface and the door threshold. Proper threshold height helps the roofing contractor terminate the waterproofing membrane correctly.
Parapet wall
A low wall around the edge of a roof. Parapet height affects patio termination, drainage, edge details, and wind behavior.
Edge condition
The way a rooftop patio terminates at a parapet, wall, curb, open edge, guardrail, door, stair, or transition.
Wind uplift
The upward force created by wind moving across a rooftop surface. Wind uplift is often stronger near roof edges and corners.
Wind zones
Areas of a roof that experience different wind uplift pressures, commonly including field zones, edge zones, and corner zones.
Wind uplift restraint
A method used to resist upward wind forces on rooftop pavers or other surface materials.
Roof access
The ability to reach the roofing membrane, drains, or rooftop utilities after the patio is installed.
RFI
A Request for Information. RFIs often occur when drawings or specifications do not clearly explain pedestal heights, drainage, wind restraint, edge details, or roof conditions.
Shop drawings
Project-specific drawings that show layout, paver placement, pedestal locations, height ranges, patterns, details, and other installation information.
Takeoff
An estimate of the materials needed for a project, such as pavers, pedestals, protection pads, clips, accessories, or other components.
Installation speed
How quickly a pedestal system can be installed in the field. Installation speed affects labor cost, project schedule, and contractor efficiency.
Lead time
The time required to receive materials after they are ordered. Long lead times can increase the risk of delays, ordering mistakes, and difficulty getting additional product if needed.
SkyJack adjustable pedestal
Skydeck USA’s adjustable pedestal system used to support elevated rooftop patio surfaces over sloped roofs.
SkyWalk concrete paver
Skydeck USA’s concrete rooftop paver used in pedestal-supported rooftop patio systems.
WindStrong paver restraint system
Skydeck USA’s wind uplift restraint system for pedestal-supported rooftop paver assemblies.
SkyHeights Pedestal Reinforcement System
Skydeck USA’s reinforcement system for taller pedestal assemblies that require additional lateral stability.
Introduction: Rooftop Patio Design Has Never Been More Popular—or More Complex
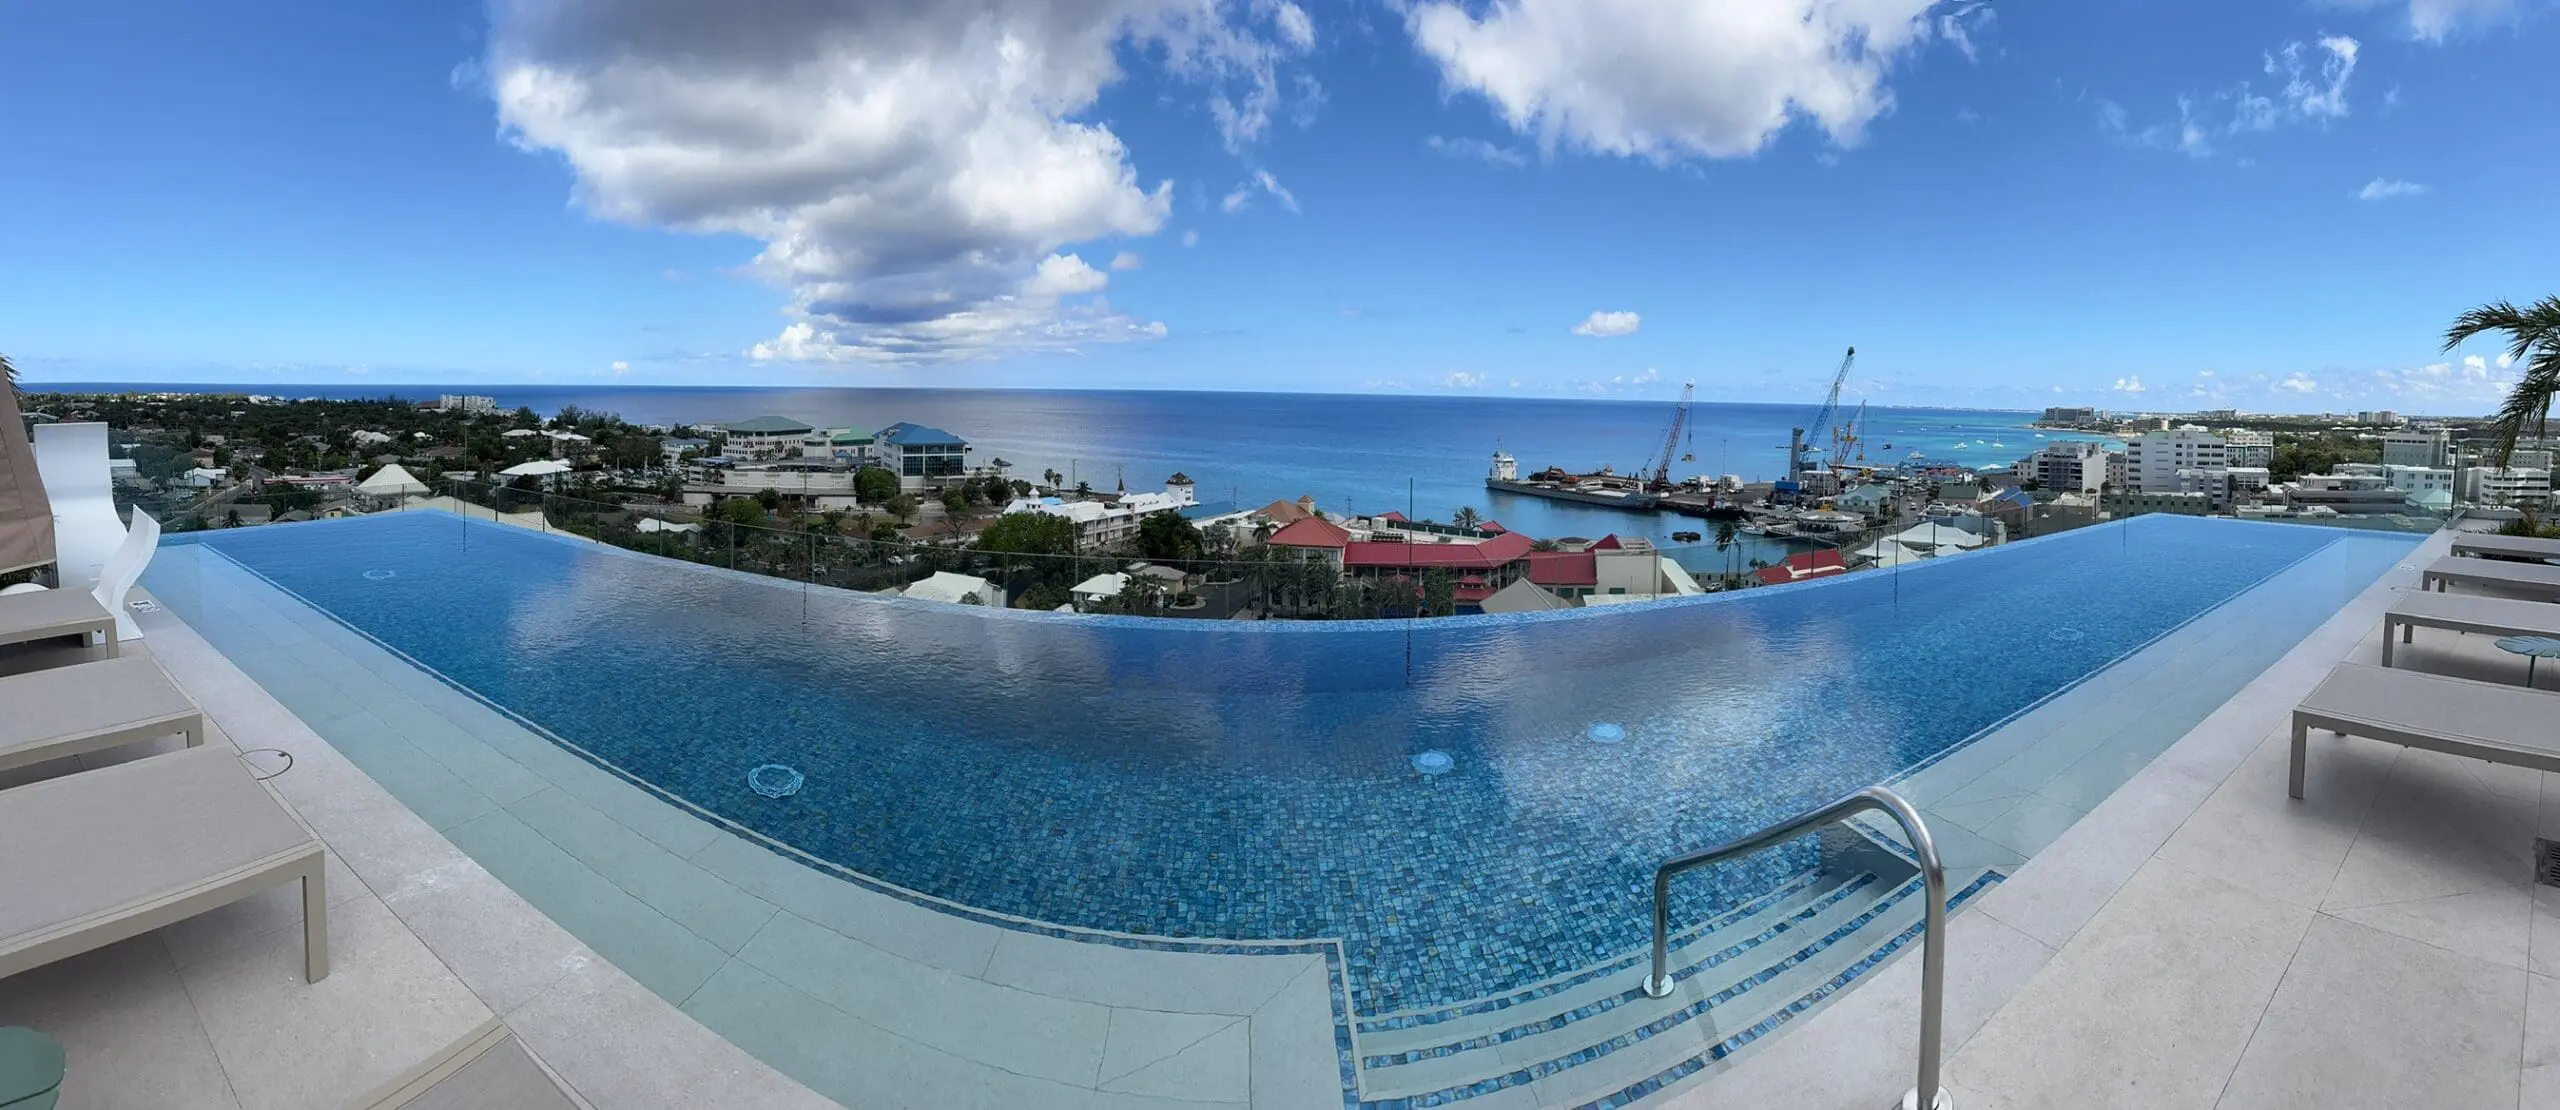
Walk through almost any new mixed-use development, luxury apartment community, office building, hotel, or hospital today and you’ll notice one thing they increasingly have in common: usable rooftop space.
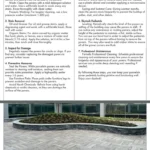
What was once little more than mechanical equipment and roofing membrane has become some of the most valuable square footage on a building. Rooftop patios create premium outdoor amenities, increase rental value, provide gathering spaces, and transform otherwise unused roofs into destinations for tenants, employees, customers, and guests.
At the same time, they serve another important purpose.
A properly designed pedestal-supported rooftop system helps protect the roofing membrane from ultraviolet exposure, hail, foot traffic, and everyday wear, often extending the service life of the roof while making future maintenance significantly easier.
It’s no surprise that rooftop pedestal systems have become one of the fastest-growing segments of commercial construction.
Yet despite their growing popularity, they remain unfamiliar territory for many design professionals.
Unlike traditional paving systems, rooftop pedestal assemblies require architects to coordinate structural loading, drainage, finished elevations, waterproofing, accessibility, wind uplift, long-term maintenance, and installation sequencing—all while creating an attractive finished space.
That’s a lot of moving parts.
Many architects may only specify a handful of rooftop pedestal projects during their careers, making it difficult to gain the field experience needed to anticipate installation challenges before construction begins.
That’s where many problems originate.
In our experience, rooftop projects rarely fail because someone selected a poor product.
Instead, they encounter delays, change orders, installation questions, or long-term maintenance issues because one or two important design considerations weren’t fully addressed during specification.
Fortunately, nearly all of these issues are preventable.
Over the past several years, our team at Skydeck USA has worked alongside architects, engineers, general contractors, waterproofing contractors, and installers on hundreds of rooftop projects throughout North America. Every project is different, but the same patterns continue to emerge.
The most successful projects have one thing in common:
They begin by asking the right questions early.
This guide is designed to share practical lessons from the field while showing how better product coordination can help architects specify rooftop pedestal systems with fewer surprises.
Whether you’re designing your first rooftop pedestal system or your fiftieth, these five recommendations can help eliminate unnecessary surprises and produce a rooftop assembly that’s easier to specify, easier to install, and easier to maintain for years to come.
Mistake #1: Not Understanding the Roof Before Selecting the System
One of the most common misconceptions about rooftop patios is that the design process begins by selecting a flooring material.
Should the project use concrete pavers, porcelain pavers, Ipe deck tiles, or artificial turf?
While those are important decisions, they shouldn’t be the first ones.
The first step is understanding the roof itself.
Before any pedestal system is specified, the design team should develop a clear understanding of the existing roof assembly and the conditions that will ultimately determine which systems can—and cannot—be used successfully.
One of the first questions we ask on nearly every rooftop project is surprisingly simple:
“Tell us about the roof.”
That conversation almost always shapes every recommendation that follows.
The most successful rooftop projects aren’t necessarily the ones with the biggest budgets or the most elaborate designs. They’re the ones where the design team understands the building before selecting the products.
Every Roof Has Different Design Constraints
No two rooftop projects are exactly alike.
Even buildings that appear nearly identical may have completely different structural capacities, insulation thicknesses, roofing systems, door thresholds, drainage layouts, or rooftop mechanical equipment.
Because of this, rooftop pedestal systems should never be selected based solely on appearance or because they worked well on another project.
Instead, architects should first understand the building they’re designing for.
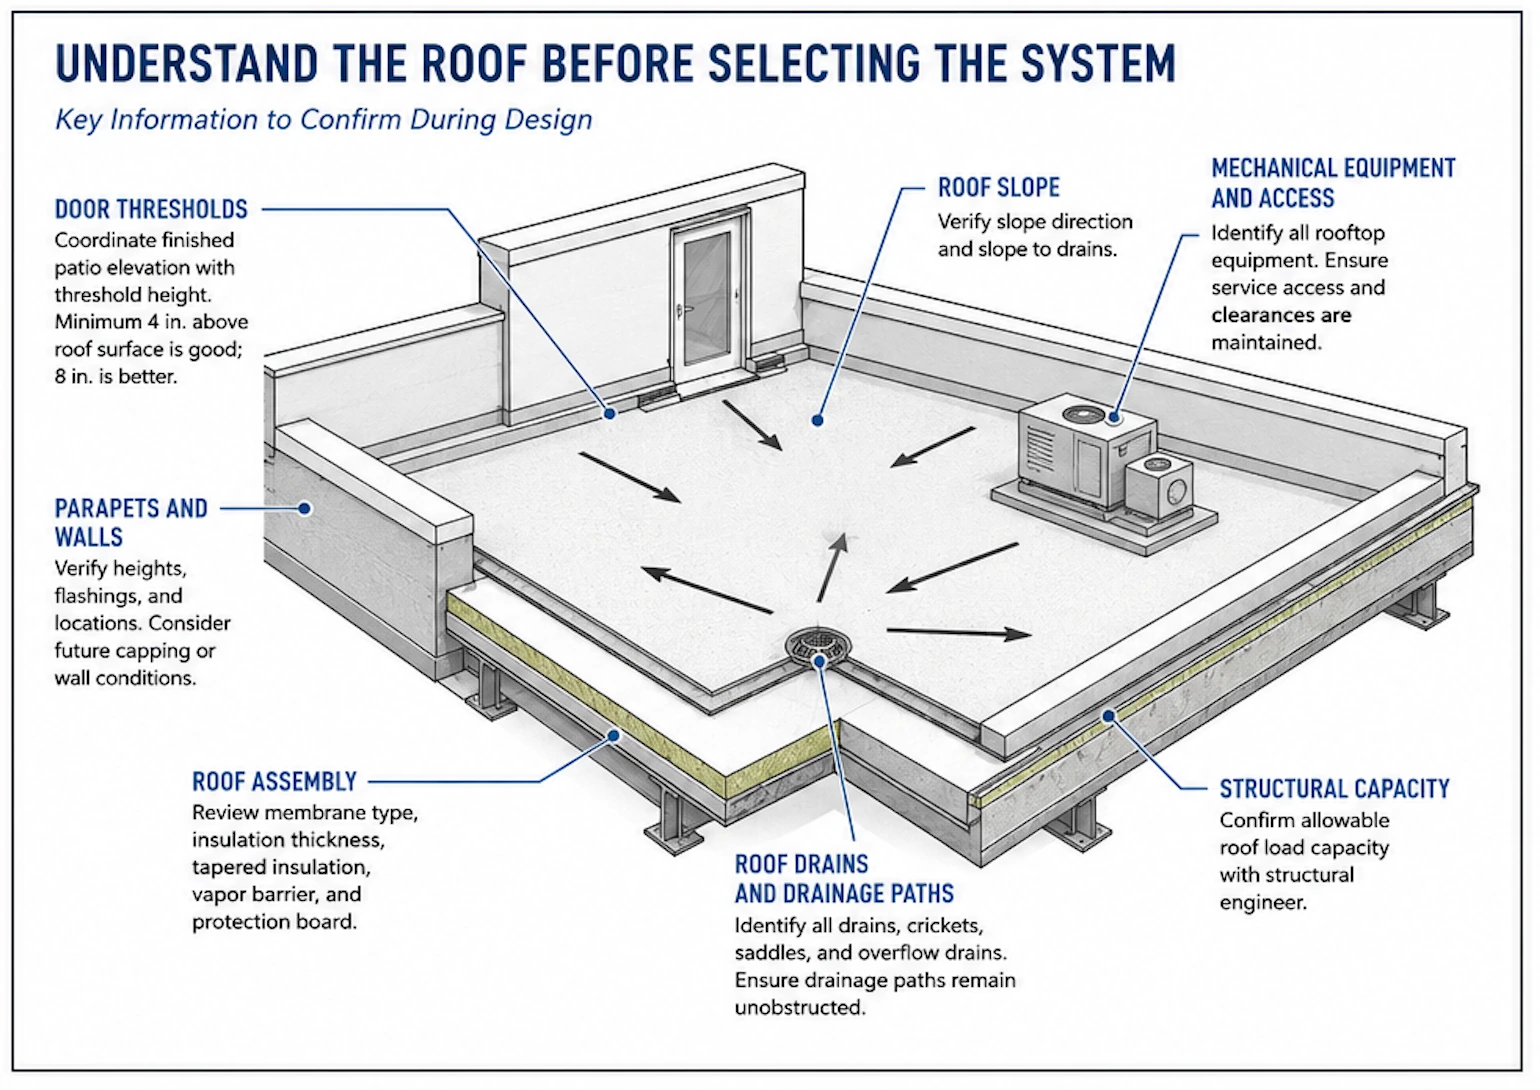
Structural Load Capacity
Perhaps the most important question is how much additional dead load the roof can safely support.
Concrete pavers offer outstanding durability, impact resistance, and longevity, but they are considerably heavier than porcelain pavers, Ipe deck tiles, or synthetic turf systems. On older buildings—or projects with limited structural capacity—the desired finish material may simply exceed what the structure was designed to carry.
Discovering this after the design has progressed often leads to redesigns, value engineering, or product substitutions that could have been avoided.
Whenever possible, confirm the available roof loading with the structural engineer before selecting finish materials.
Roofing Assembly
Understanding the roofing system itself is equally important.
Questions that should be answered early include:
- What waterproofing membrane is being used?
- How thick is the insulation package?
- Is tapered insulation part of the roof design?
- Are there multiple roof levels?
- Where are the roof drains located?
- Are there expansion joints?
- Are there rooftop penetrations or mechanical equipment that will require future access?
Each of these details influences pedestal heights, layout, drainage, maintenance access, and long-term performance.
The more information that’s available during design, the fewer surprises typically occur during construction.
Door Thresholds and Waterproofing
Finished elevations should also be considered early.
Door thresholds often become the controlling elevation for the entire rooftop assembly, influencing pedestal heights, drainage, accessibility, and the overall finished appearance of the project.
If threshold elevations aren’t coordinated with flooring thickness and pedestal heights during design, contractors may discover late in construction that the finished patio cannot achieve the required ADA transitions or drainage clearances without significant modifications.
Just as importantly, threshold height plays a critical role in the long-term performance of the waterproofing system.
A door threshold that is at least 4 inches above the finished roof surface generally provides enough vertical space for the roofing contractor to properly extend the waterproofing membrane up the wall and achieve a secure, long-lasting bond. An 8-inch threshold is even better, providing additional protection against wind-driven rain, snow accumulation, and standing water while giving the roofing contractor more surface area to properly terminate the membrane.
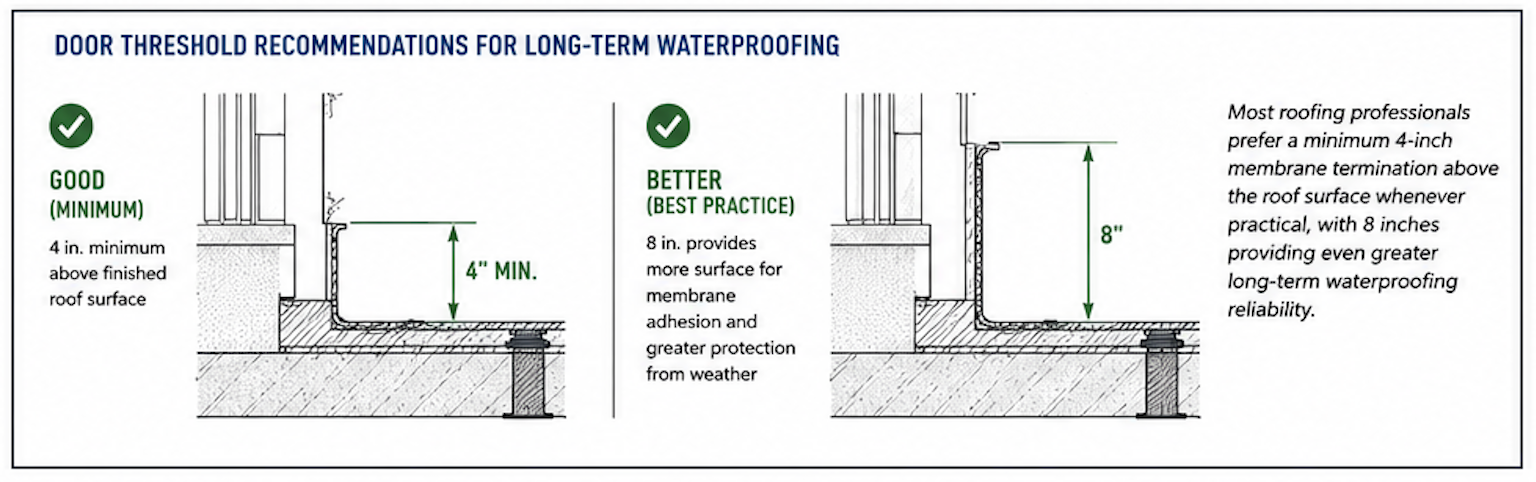
When thresholds are only one or two inches above the roof, the roofer has very little vertical surface available for adhesion. Instead of creating a robust waterproofing transition, the membrane may rely on only a narrow strip of bonded material. Over years of building movement, thermal expansion, and weather exposure, that limited adhesion increases the likelihood of water intrusion.
Although threshold elevations are often dictated by the building design, coordinating these details early allows architects, structural engineers, and roofing consultants to develop details that improve the long-term reliability of the entire roof assembly—not just the rooftop patio.
Environmental Conditions
Another consideration that’s sometimes overlooked early in design is the building’s environment.
Projects located in coastal regions, high-wind zones, hurricane-prone areas, or locations with significant freeze-thaw cycling often require different design considerations than projects in milder climates.
Understanding these conditions before selecting a rooftop system allows architects to evaluate flooring materials, pedestal systems, and wind uplift strategies that are appropriate for the project’s location instead of trying to solve environmental challenges later.
Asking Better Questions Leads to Better Specifications
One of the most valuable habits architects can develop is simply asking better questions earlier.
At Skydeck USA, we’ve intentionally built our design assistance process around understanding the project before recommending products.
Rather than immediately suggesting a pedestal system, we first work to understand the building.
Questions like:
- What is the roof load capacity?
- Is this new construction or an existing building?
- What roofing membrane is being used?
- How high are the finished door thresholds?
- Has pedestal height planning begun?
- Will the project require wind uplift protection?
- What flooring materials are being considered?
Those answers allow us to recommend systems that fit the building—not the other way around.
Many architects don’t yet know all of those answers when they first contact us.
That’s perfectly normal.
Our role isn’t simply supplying products. It’s helping project teams identify the information they’ll need before finalizing the specification.
We’ve found that projects move more efficiently when the design team has access to practical guidance early in the process. It simplifies specification, gives architects greater flexibility as the design evolves, and helps make the project smoother for everyone involved—from design through installation.
Lessons We’ve Learned from the Field
One of the most common comments we hear after a rooftop project is complete is:
“I wish we had known that before we finalized the drawings.”
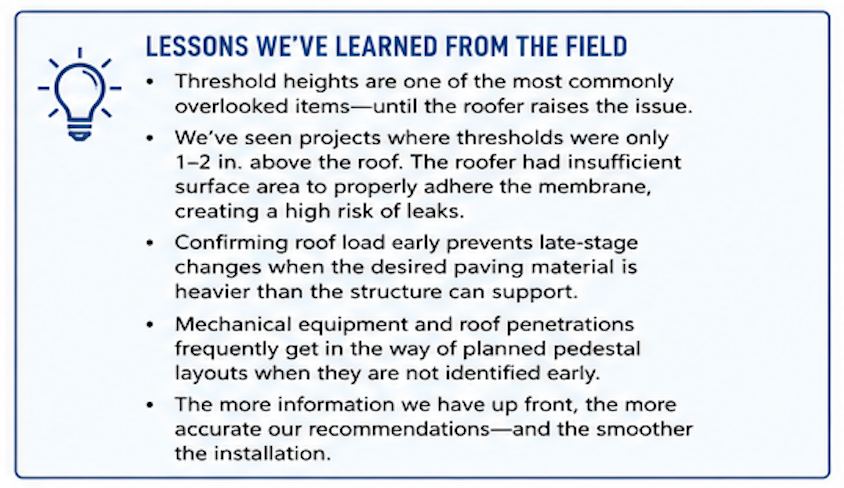
More often than not, the issue isn’t the pedestal system itself. It’s a design detail that wasn’t communicated early enough—an unexpected threshold elevation, a roof drain that changed pedestal heights across half the patio, a parapet that affected edge conditions, or a structural load limitation that wasn’t identified until materials had already been selected.
Those situations are rarely the result of poor design. They’re simply the result of information becoming available too late.
That’s why we’ve learned that the best rooftop projects don’t begin with product selection—they begin with understanding the building. Once the design team has that foundation, selecting the right rooftop system becomes dramatically simpler.
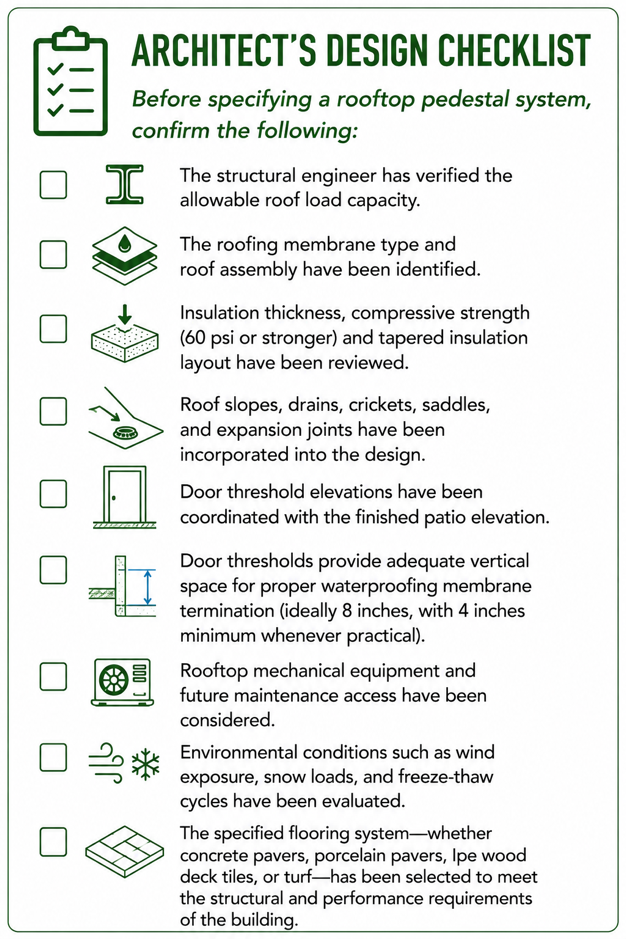
Architect’s Design Checklist
Before specifying a rooftop pedestal system, confirm the following:
- ☐ The structural engineer has verified the allowable roof load capacity.
- ☐ The roofing membrane type and roof assembly have been identified.
- ☐ Insulation thickness, compressive strength (60 psi or stronger) and tapered insulation layout have been reviewed.
- ☐ Roof slopes, drains, crickets, saddles, and expansion joints have been incorporated into the design.
- ☐ Door threshold elevations have been coordinated with the finished patio elevation.
- ☐ Door thresholds provide adequate vertical space for proper waterproofing membrane termination (ideally 8 inches, with 4 inches minimum whenever practical).
- ☐ Rooftop mechanical equipment and future maintenance access have been considered.
- ☐ Environmental conditions such as wind exposure, snow loads, and freeze-thaw cycles have been evaluated.
- ☐ The specified flooring system—whether concrete pavers, porcelain pavers, Ipe wood deck tiles, or turf—has been selected to meet the structural and performance requirements of the building.
Mistake #2: Ignoring Drainage and Water Management
One of the greatest advantages of a rooftop pedestal system is also one of the easiest things to overlook:
It allows the roof to continue functioning exactly as it was designed.
Every commercial roof is intentionally sloped to move water toward roof drains. Although that slope may appear almost imperceptible to someone standing on the roof, it’s one of the most important parts of the entire roofing system.
The roof isn’t intended to hold water.
It’s designed to shed it as quickly and efficiently as possible.
Unfortunately, many rooftop patio problems begin when the finished surface interferes with that drainage strategy.
Instead of working with the roof, some systems unintentionally work against it.
The result can be standing water, debris buildup, clogged drains, accelerated membrane deterioration, and costly maintenance issues that may not become apparent until years after the project is complete.
Understanding how water moves across a roof should be one of the first considerations when designing any rooftop patio.
A Rooftop Patio Should Never Change How the Roof Drains
One misconception we occasionally encounter is the belief that the finished patio should create a new, level waterproof surface above the roof.
The waterproofing already exists.
The roofing membrane is the waterproof surface.
The patio simply becomes the finished walking surface above it.
A properly designed pedestal system respects that relationship.
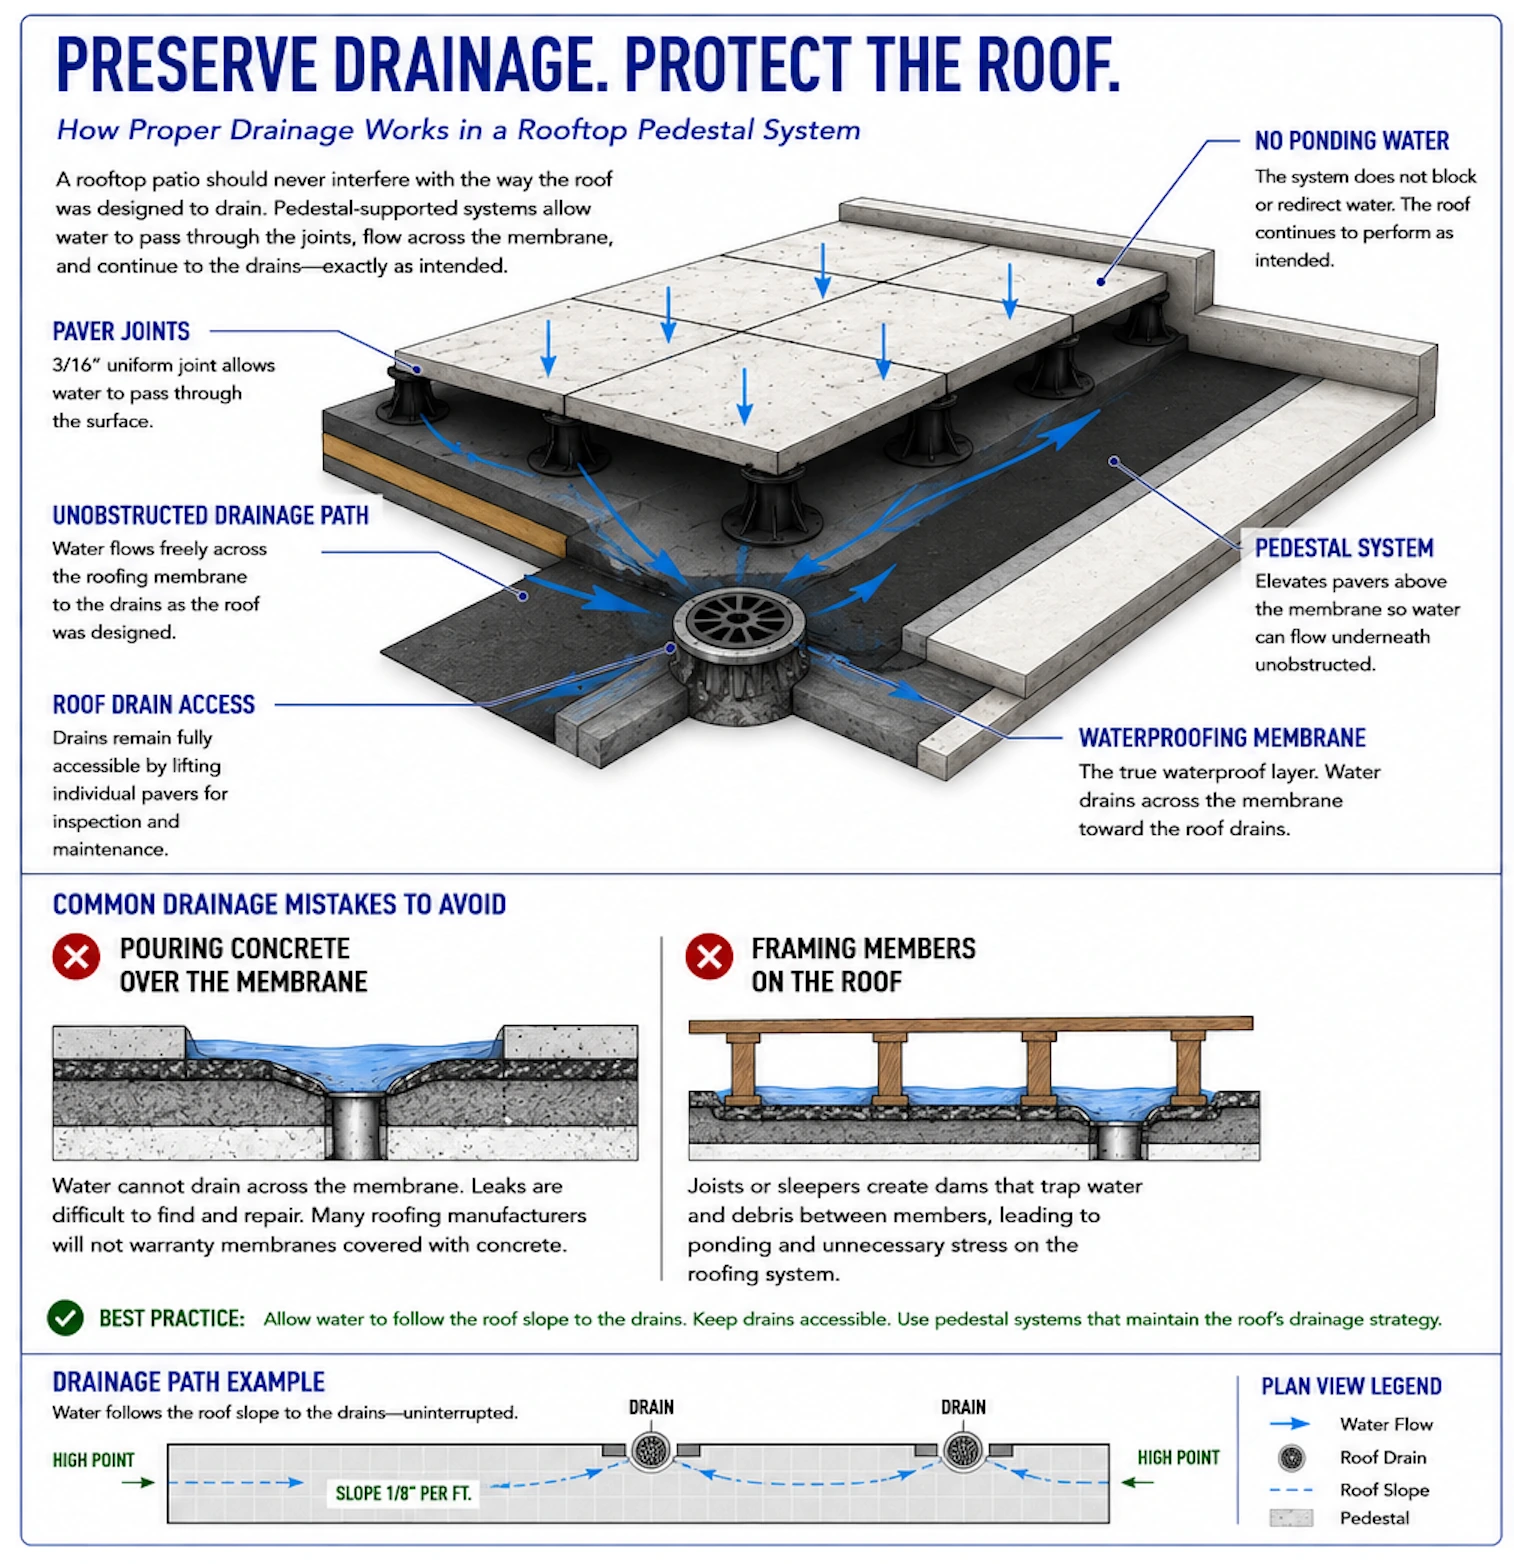
Rainwater passes through the joints between pavers, travels across the roofing membrane below, and continues toward the drains exactly as the roofing engineer intended.
Nothing blocks the drainage path.
Nothing redirects the flow.
Nothing traps water beneath the finished surface.
That’s one of the primary reasons pedestal-supported rooftop systems have become so widely accepted throughout the commercial roofing industry.
Why Paver Spacing Matters
The spacing between pavers isn’t simply an aesthetic decision.
It serves an important engineering purpose.
Consistent joints allow rainwater to drain through the finished surface while also accommodating slight dimensional variations in the pavers themselves.
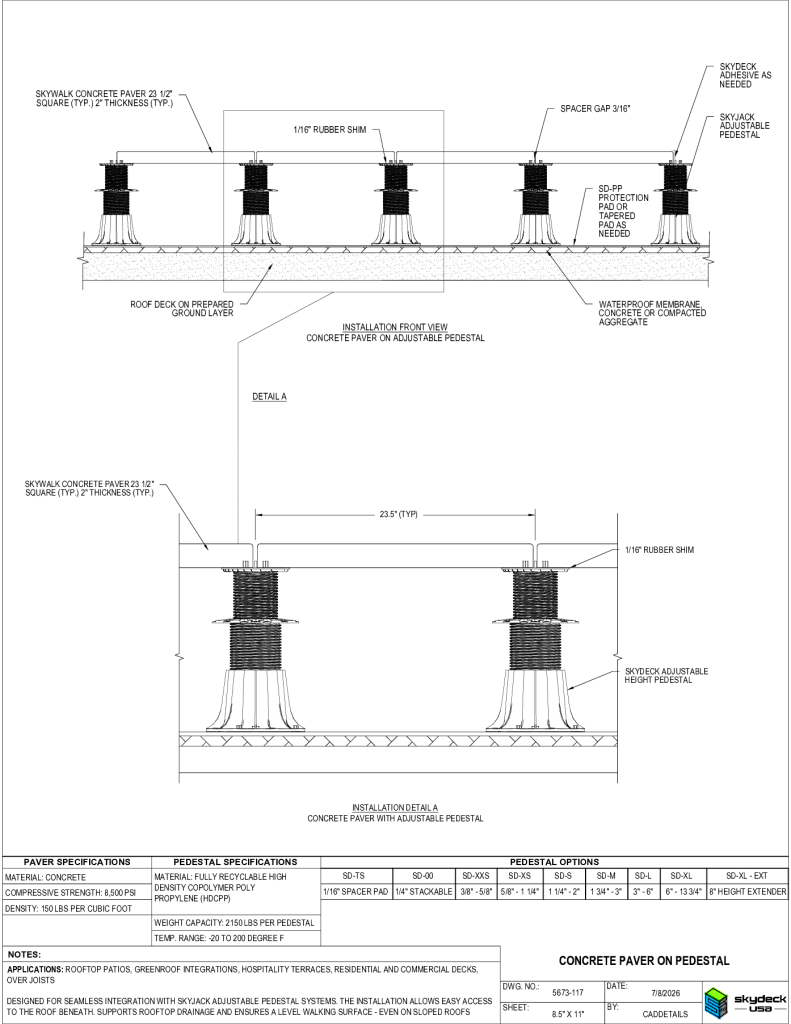
SkyJack pedestals create a uniform 3/16-inch joint between adjacent pavers, allowing water to move freely through the system without relying on the installer to manually maintain consistent spacing throughout the project.
Uniform spacing also improves the finished appearance of the patio while helping maintain consistent drainage across the roof.
Although the joint width may seem like a minor detail, it contributes to the long-term performance of the entire rooftop assembly.
Common Drainage Mistakes
Over the years, we’ve seen several recurring design approaches that unintentionally interfere with roof drainage.
Pouring Concrete Over the Roofing Membrane
One of the most problematic approaches is placing a traditional concrete slab directly on top of the roofing system.
Although it may seem like a permanent and inexpensive solution, it creates several long-term challenges.
Because water can no longer move freely across the membrane, drainage becomes dependent on the finished concrete surface rather than the roof’s engineered drainage system.
Even more concerning, many roofing manufacturers will not warranty a membrane once concrete has been poured directly over it. Poured concrete will expand and contract during freeze/thaw cycles, potentially creating premature leaks in the membrane underneath.
If a leak develops beneath the slab, locating the source often requires demolition of the entire finished patio before repairs can even begin.
Installing Wood or Metal Joists Directly on the Roof
Framed deck systems can also create drainage issues when the framing members rest directly on the roofing membrane.
Every joist becomes a small dam.
Instead of flowing naturally toward the drains, water can become trapped between framing members, leading to ponding, debris accumulation, unnecessary stress on the roofing system and fast deterioration of the treated joists.
Properly supported pedestal framing systems eliminate this issue by elevating the framing above the membrane and allowing water to continue flowing underneath. Roof drains should remain accessible for routine inspection and maintenance throughout the life of the building.
One of the advantages of pedestal-supported systems is that individual pavers can be removed quickly, allowing maintenance personnel to inspect drains or access the roofing membrane without dismantling the entire patio.
That long-term serviceability is one of the biggest reasons many building owners prefer pedestal systems over any other rooftop patio construction method.
Skydeck product connection:
SkyJack Adjustable Pedestals and SkyWalk pavers, tiles and turf are designed to create a removable rooftop surface that allows water to pass through the paver joints and drain across the roofing membrane below. This helps preserve roof drainage while maintaining access to drains and the waterproofing membrane.
Drainage Should Be Designed—Not Left to the Installer
One of the recurring themes throughout this article is that the best rooftop projects don’t rely on field decisions.
Drainage is no exception.
By the time the installer arrives, the roof’s drainage strategy should already be understood.
The contractor shouldn’t be deciding where water will flow, how pedestal spacing should work, or how roof drains will remain accessible.
Those questions should already have been answered during design.
That’s why we encourage architects to think of rooftop patios as complete systems rather than simply flooring materials placed on a roof.
When drainage, accessibility, waterproofing, and maintenance are considered together, the finished project performs better—and typically requires fewer questions during construction.
This systems-based approach gives architects greater flexibility while making the project simpler to specify and easier for contractors to build correctly the first time.
Lessons We’ve Learned from the Field
One of the first things we look for when reviewing a rooftop plan isn’t the paver pattern.
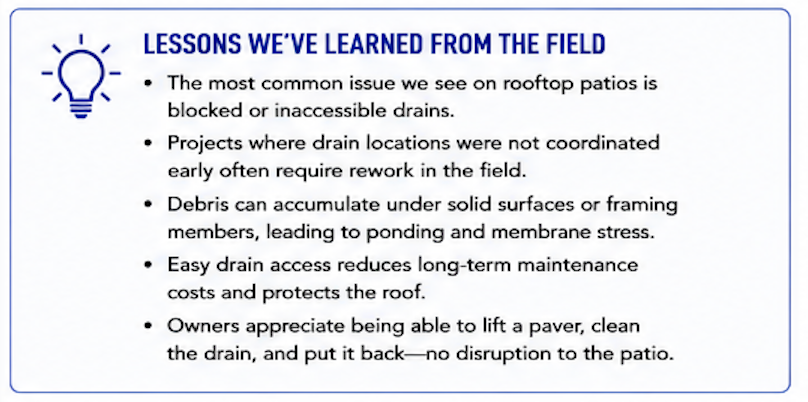
It’s the drains.
If the drainage strategy isn’t clear, everything else becomes more difficult.
We’ve seen beautifully designed rooftop patios where a single overlooked drain location created hours of field modifications. We’ve also seen projects where contractors were forced to remove newly installed pavers simply because no one had considered how the drains would be cleaned after the patio was complete.
Those problems are almost always avoidable.
The best rooftop patios don’t just look good on opening day.
They continue draining properly, remain easy to maintain, and allow the roof underneath to perform exactly as it was designed for decades to come.
Pro Tip From the Field
Don’t just show where the drains are—specify a system that ensures drain access.
When reviewing rooftop plans, ask yourself one simple question:
“If this drain plugs five years from now, how will someone access it?”
If the answer isn’t obvious from the drawings, it’s worth revisiting the specifications.
Architect’s Design Checklist
Before finalizing the drainage design, confirm the following:
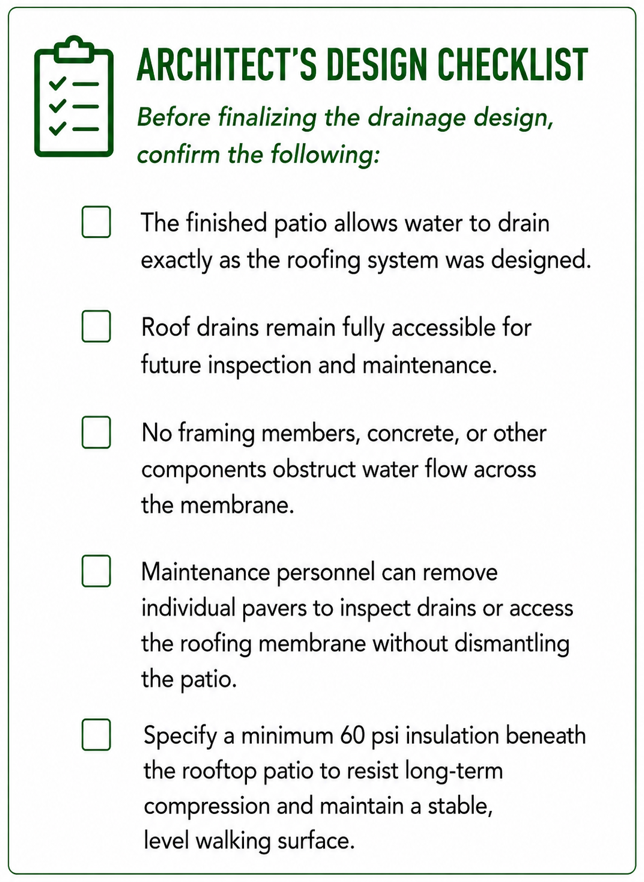
- ☐ The finished patio allows water to drain exactly as the roofing system was designed.
- ☐ Roof drains remain fully accessible for future inspection and maintenance.
- ☐ No framing members, concrete, or other components obstruct water flow across the membrane.
- ☐ Maintenance personnel can remove individual pavers to inspect drains or access the roofing membrane without dismantling the patio.
- ☐ Specify a minimum 60 psi insulation beneath the rooftop patio to resist long-term compression and maintain a stable, level walking surface.
Mistake #3: Leaving Pedestal Height Planning Until Construction
If drainage is the most misunderstood part of rooftop patio design, pedestal heights are probably the most underestimated.
Many people assume determining pedestal heights is as simple as measuring from the roof to the finished floor.
Unfortunately, rooftop projects are rarely that straightforward.
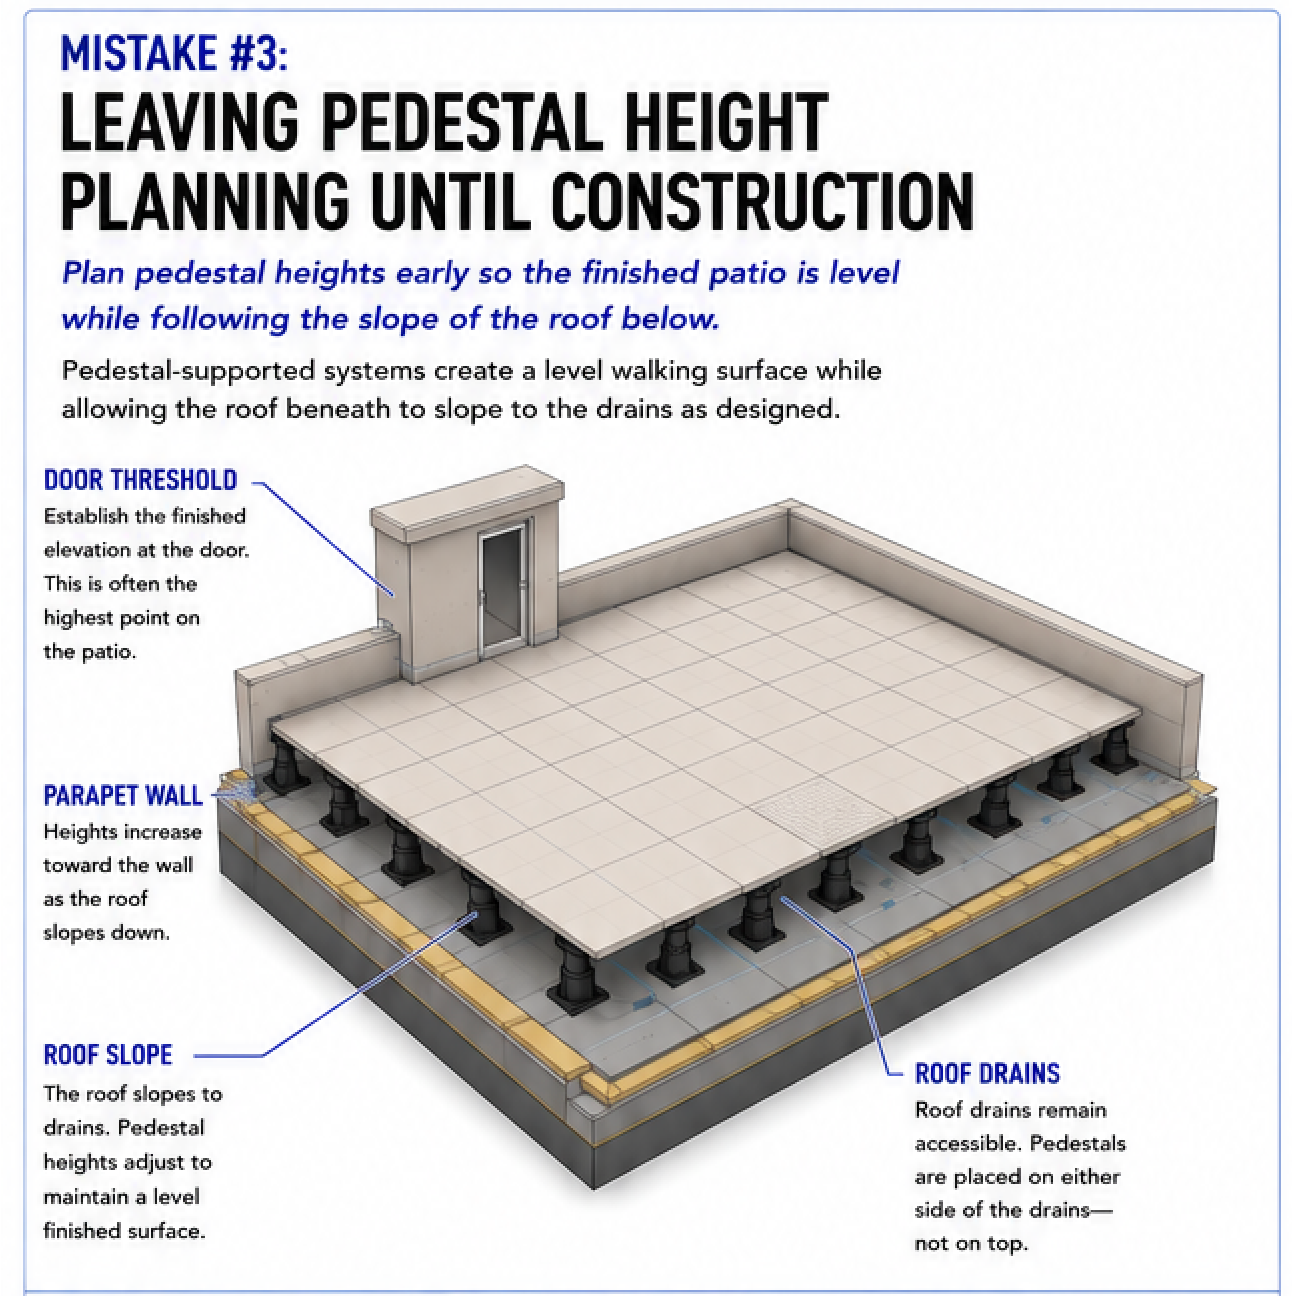
Unlike a concrete slab, where the finished elevation is established all at once, pedestal-supported systems follow the roof below while creating a perfectly level walking surface above. Every inch of roof slope changes the required pedestal height, meaning the correct pedestal at one corner of the patio may be completely different from the pedestal only a few feet away.
The earlier these height changes are understood, the smoother the project tends to go.
When they’re left until construction, installers often find themselves solving design questions in the field—exactly where architects don’t want important decisions being made.
Pedestal Heights Are Three-Dimensional
One of the biggest misconceptions we encounter is that pedestal heights only change in one direction.
In reality, rooftops frequently slope toward multiple drains, creating valleys, crickets, saddles, and changing elevations across the patio.
That means pedestal heights often change in both directions simultaneously.
A contractor standing on the roof can’t accurately estimate those changes simply by looking at the building.
Instead, successful projects begin with understanding the roof as a three-dimensional surface.
Every drain, parapet, roof edge, cricket, saddle, and threshold contributes to the final pedestal schedule.
Where Height Planning Begins
Accurate pedestal layouts typically begin at the highest finished elevation on the project.
In many cases, that’s the door threshold.
From there, installers use a rotary or laser level to establish the finished patio elevation before measuring down to the roofing membrane throughout the project.
Measurements should be taken at every location that influences the finished surface, including:
- Door thresholds
- Roof drains
- High points
- Low points
- Roof edges
- Parapet walls
- Crickets
- Saddles
- Expansion joints
- Changes in roof elevation
These measurements become the foundation for selecting pedestal heights and determining where transitions occur across the rooftop.
Skipping this step almost always creates unnecessary uncertainty later.
One Drawing Can Eliminate Dozens of Questions
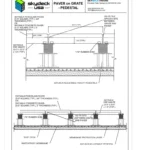
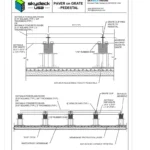
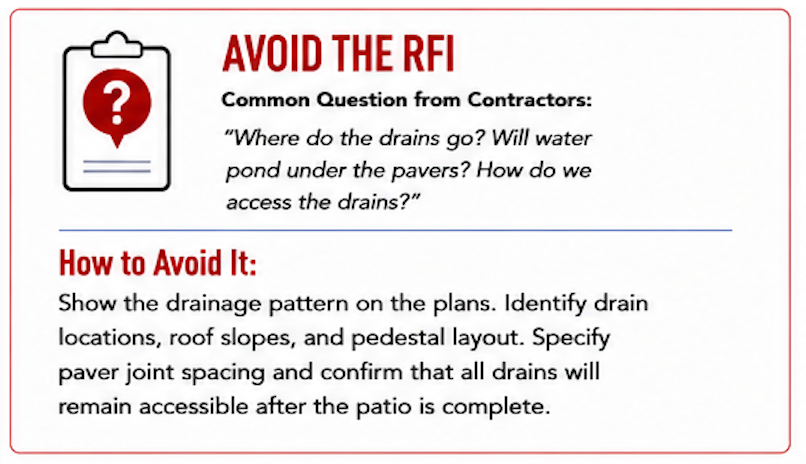
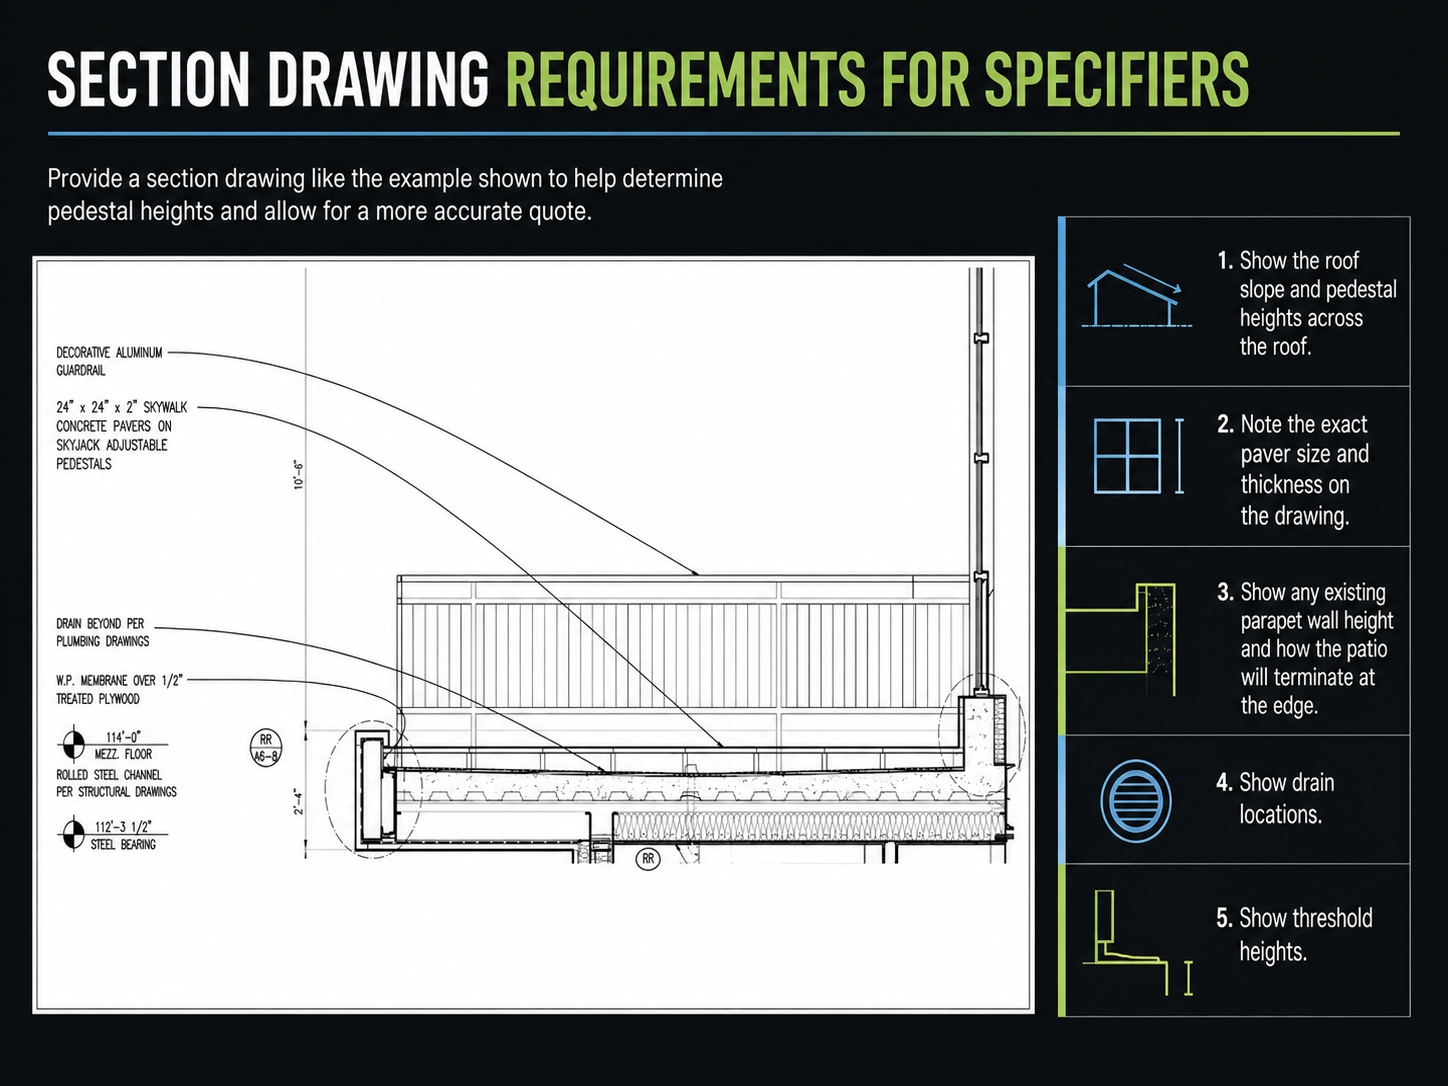
One of the most valuable things an architect can include in the construction documents is section and elevation drawings through the rooftop patio.
Plan views show where things are located.
Sections explain how they’re supposed to work.
A well-developed section drawing communicates information that simply cannot be understood from a plan view alone.
Whenever possible, include sections and elevations that clearly show:
- Finished patio elevations
- Door threshold relationships
- Roof slope beneath the patio
- Pedestal height transitions
- Drain locations
- Parapet conditions
- Edge conditions
- Stair transitions
- Changes in roof elevation
- Paver size and type
Even simple section drawings can dramatically reduce RFIs because they clearly communicate the architect’s design intent.
Rather than asking the contractor to determine finished elevations in the field, the drawings establish exactly what the completed patio should look like.
That clarity benefits everyone involved in the project.
Understanding Stackable vs. Adjustable Pedestals
Another consideration that’s often overlooked is selecting the appropriate pedestal type for the required height range.
Not every rooftop condition requires an adjustable pedestal.
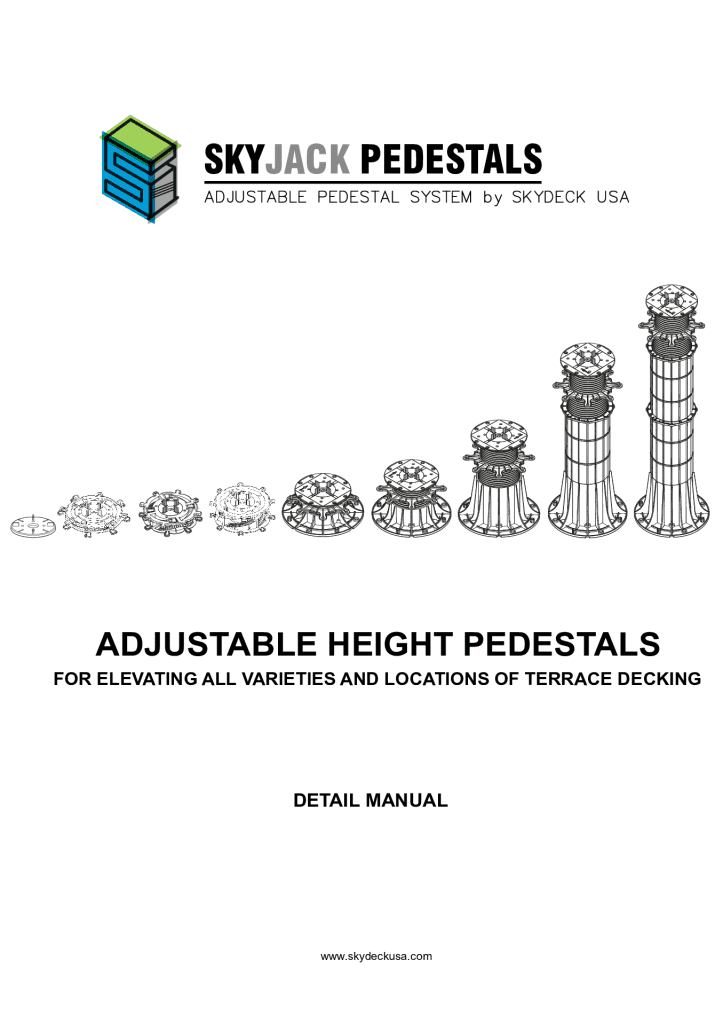
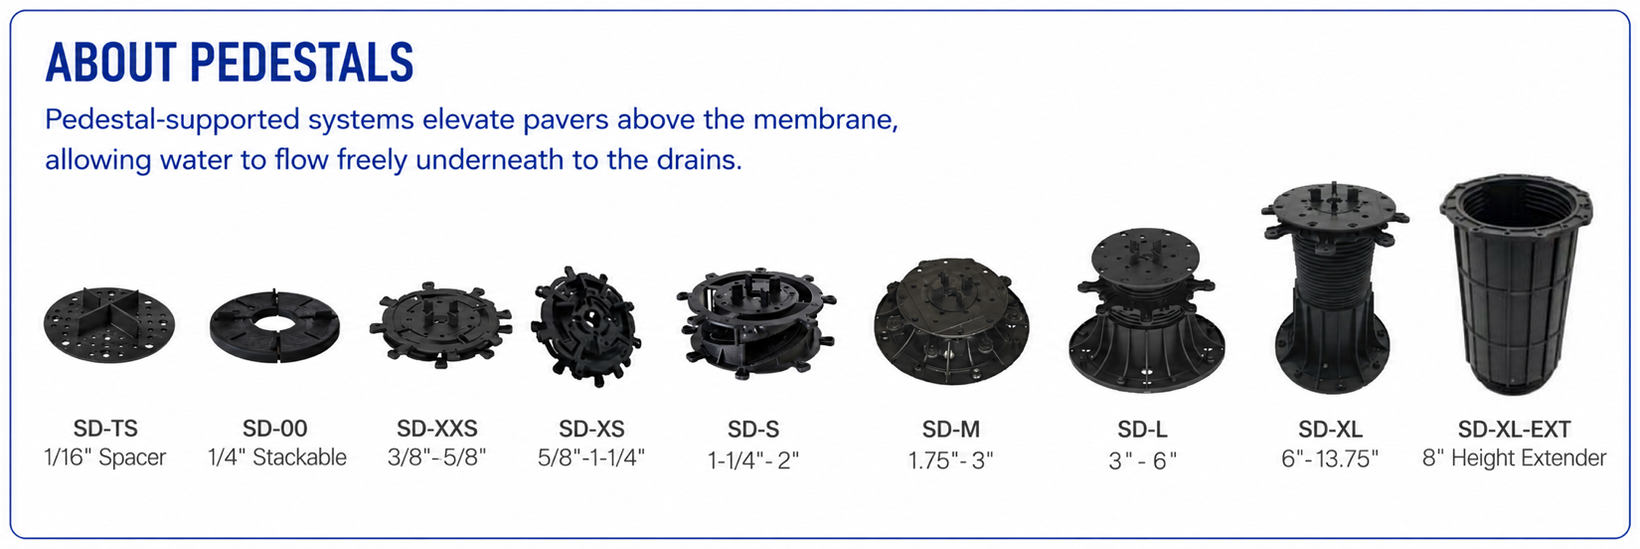
Very low finished elevations are often better suited for stackable pedestals, which begin at just 1/16 inch and can be stacked to achieve precise low-profile heights.
Once the finished elevation increases, adjustable pedestals become the more efficient solution.
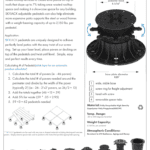
SkyJack adjustable pedestals begin at 3/8 inch and use a threaded adjustment ring that allows installers to fine-tune finished elevations by simply rotating the pedestal rather than adding shims or rebuilding portions of the patio.
This flexibility becomes especially valuable on rooftops where elevations vary significantly across the project.
Tall Rooftops Require More Than Taller Pedestals
As rooftop assemblies become taller, the engineering becomes more important. Projects requiring pedestal heights above approximately 21¾ inches should no longer be viewed as simply “using taller pedestals.” They become engineered assemblies. Additional reinforcement, lateral stability, and self-leveling components become critical to maintaining a safe, durable installation.
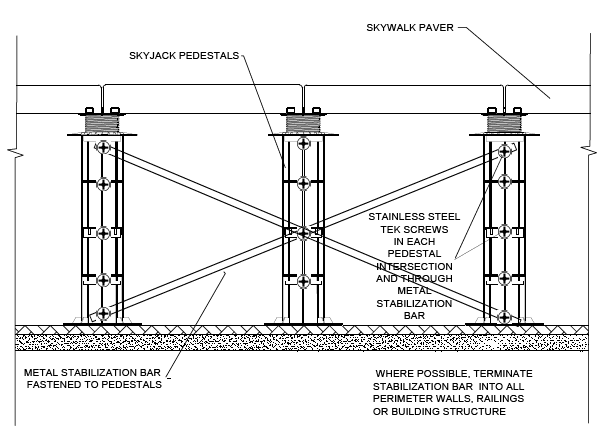
For taller rooftop applications, systems such as the SkyHeights Pedestal Reinforcement System provide engineered cross-bracing that stabilizes pedestal assemblies while maintaining the flexibility and accessibility that pedestal systems are known for.
The important takeaway isn’t simply that tall pedestal systems exist.
It’s that these details should be incorporated into the specification—not improvised during installation.
Planning Heights Early Makes Every Other Decision Easier
One of the recurring themes throughout this guide is that rooftop projects become dramatically easier when important decisions are made during design instead of construction.
Pedestal heights influence nearly everything else:
- Drainage
- Accessibility
- Door transitions
- Stair design
- Edge details
- Material quantities
- Installation sequencing
- Labor requirements
When those elevations have already been studied, contractors spend less time solving problems and more time installing the project.
That’s one reason we’ve found that providing pedestal takeoffs, preliminary layouts, and shop drawings early in the process helps eliminate unnecessary project friction. It gives architects greater confidence that the design intent can be achieved while making the installation more straightforward for the contractor.
Lessons We’ve Learned from the Field
If there’s one comment we hear more than almost any other, it’s:
“I wish we had included another section through this part of the roof.”
The majority of pedestal-related questions don’t come from the pedestal itself.
They come from uncertainty about the finished elevations.
We’ve found that projects with well-developed sections and elevations generate significantly fewer RFIs than projects that rely almost entirely on plan views.
Contractors aren’t trying to redesign the project.
They’re simply trying to understand what the architect intended.
The clearer that intent is communicated on paper, the smoother the installation usually becomes.
Skydeck product connection:
SkyJack Adjustable Pedestals are used where rooftop elevations vary because of slope, drains, thresholds, crickets, saddles, parapets, and roof edges. If you have slopes greater than ¼” per foot, use our SD-BSC base slope correctors with pedestals 2” or taller or SD-XL-SLH self-leveling heads with pedestals under 2” to accommodate for slope.
Avoid the RFI
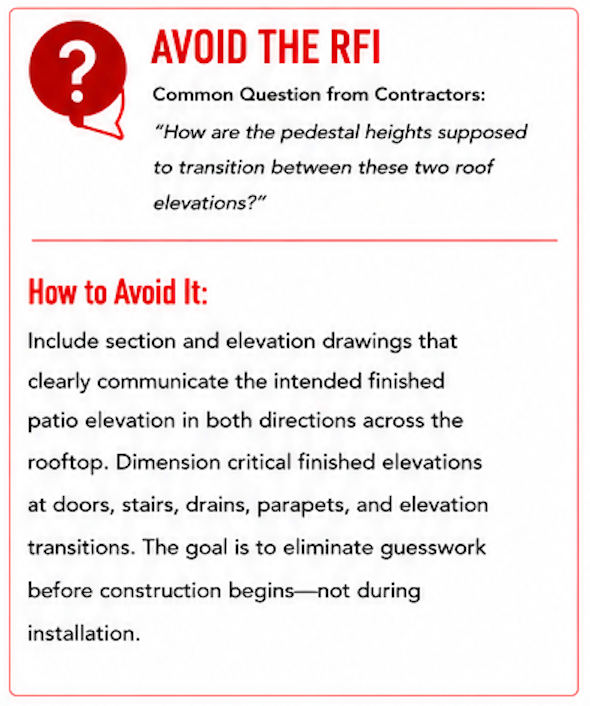
Common Question from Contractors
“How can we determine what pedestal heights we need?”
How to Avoid It
Include section and elevation drawings that clearly communicate the intended finished patio elevation in both directions across the rooftop.
Dimension critical finished elevations at doors, stairs, drains, parapets, and elevation transitions.
The goal is to eliminate guesswork before construction begins—not during installation. This will also ensure accurate project budgets from the beginning without expensive change orders later.
Architect’s Design Checklist
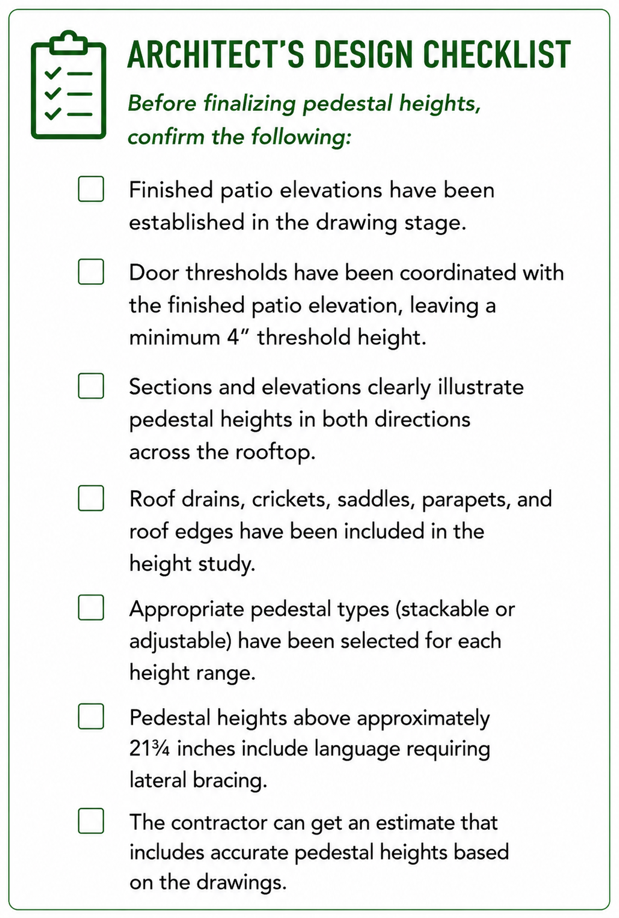
Before finalizing pedestal heights, confirm the following:
- ☐ Finished patio elevations have been established in the drawing stage.
- ☐ Door thresholds have been coordinated with the finished patio elevation, leaving a minimum 4” threshold height.
- ☐ Sections and elevations clearly illustrate pedestal heights in both directions across the rooftop.
- ☐ Roof drains, crickets, saddles, parapets, and roof edges have been included in the height study.
- ☐ Appropriate pedestal types (stackable or adjustable) have been selected for each height range.
- ☐ Pedestal heights above approximately 21¾ inches include language requiring lateral bracing.
- ☐ The contractor can get an estimate that includes accurate pedestal heights based on the drawings.
Mistake #4: Leaving Wind Uplift Requirements Until Construction
One of the most expensive mistakes on rooftop patio projects happens long before the contractor arrives on site.
The construction documents simply state “pedestal paver system,” but never address how the finished patio will resist wind uplift.
Unfortunately, that decision cannot be left until installation.
By the time a contractor begins asking questions about wind exposure, roof zones, attachment methods, or engineering requirements, the project is already headed toward RFIs, delays, redesigns, and unexpected costs.
Like drainage and pedestal heights, wind uplift should be considered during the design phase—not after materials have been ordered.
Wind Affects Every Rooftop Differently
Not every rooftop requires the same wind uplift strategy.
Several factors influence the design, including:
- Building height
- Geographic location
- Basic wind speed
- Exposure category
- Roof geometry
- Parapet height
- Distance from roof edges and corners
- Flooring material being installed
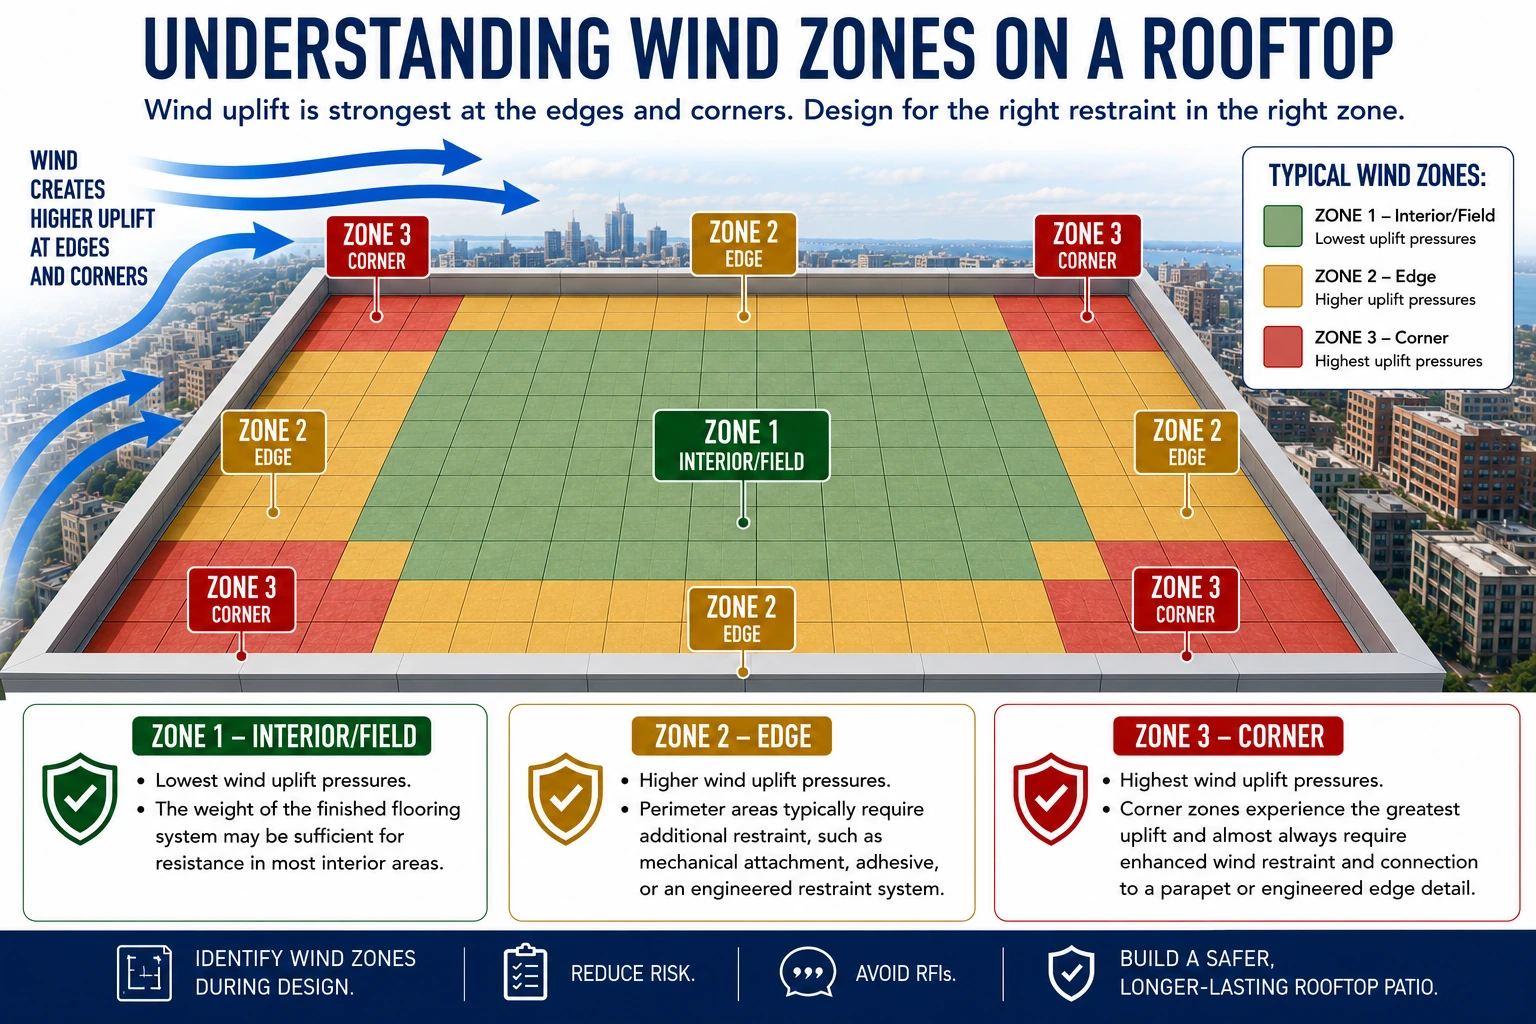
For many interior roof areas, the weight of the finished flooring system may provide adequate resistance.
However, perimeter and corner zones often experience significantly greater uplift pressures and typically require additional restraint.
Understanding those conditions early allows the design team to specify the appropriate system before construction begins.
The Flooring Material Matters
Different rooftop flooring materials respond differently to wind.
Concrete pavers provide substantial dead load because of their weight.
Porcelain pavers, Ipe deck tiles, and artificial turf systems are much lighter and frequently require additional wind restraint depending on the project conditions.
Selecting the appropriate flooring system should always include evaluating both structural loading and wind performance.
The goal is to balance building limitations with long-term durability, occupant safety, and code compliance.
The Biggest Mistake: Expecting the Contractor to Figure It Out

One of the most common comments contractors make is:
“The plans don’t tell us what to do for wind uplift.”
When wind restraint isn’t addressed during design, contractors are forced to request clarification before work can continue.
Questions often include:
- Which roof zones require restraint?
- Which pavers require mechanical attachment?
- Is adhesive acceptable?
- Are penetrations permitted?
- Who is engineering the edge restraint?
- Does this affect the roofing warranty?
Each unanswered question becomes another RFI.
Each RFI adds time, uncertainty, and cost.
Projects move much more smoothly when these details are resolved before bidding.
Avoid Roof Penetrations Whenever Possible
One of the most important principles of rooftop design is protecting the waterproofing system.
Fastening pedestals directly through the roofing membrane is generally discouraged because penetrations can:
- Void roofing warranties
- Create future leak locations
- Increase long-term maintenance
- Shift responsibility between trades
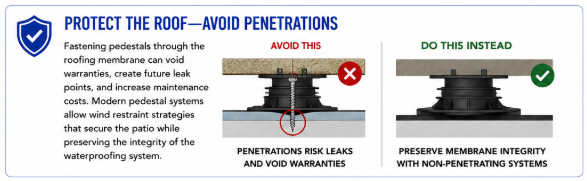
Modern rooftop pedestal systems allow wind restraint strategies that preserve the integrity of the roofing membrane while still meeting engineering requirements.
Protecting the roof should always remain a primary design objective.
Skydeck product connection:
WindStrong Paver Restraint System is Skydeck USA’s wind uplift restraint solution for pedestal-supported rooftop paver assemblies. It is used when project-specific wind conditions require additional restraint, especially near roof edges, corners, and other high-uplift areas.
Lessons We’ve Learned from the Field
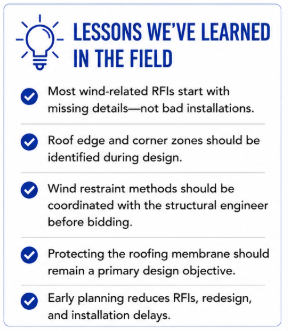
After supporting hundreds of rooftop projects, we’ve learned several consistent lessons.
The projects with the fewest RFIs and change orders almost always have one thing in common:
The wind uplift strategy was addressed during design.
When architects clearly identify roof zones, specify restraint requirements, and coordinate with the structural engineer, contractors can install the system with confidence.
Waiting until construction almost always creates unnecessary uncertainty.
Better Specifications Create Better Projects
A rooftop patio isn’t simply a collection of pavers sitting on pedestals.
It is an engineered assembly that must satisfy structural, architectural, waterproofing, and wind performance requirements simultaneously.
By coordinating these requirements early, architects reduce risk for every member of the project team while creating a rooftop system that is easier to specify, easier to install, and easier to maintain for years to come.
Architect’s Design Checklist
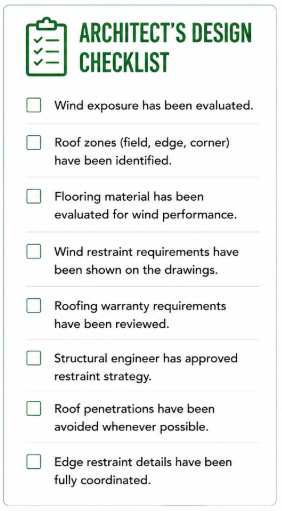
- ☐ Wind exposure has been evaluated.
- ☐ Roof zones (field, edge, corner) have been identified.
- ☐ Flooring material has been evaluated for wind performance.
- ☐ Wind restraint requirements have been shown on the drawings.
- ☐ Roofing warranty requirements have been reviewed.
- ☐ Structural engineer has approved restraint strategy.
- ☐ Roof penetrations have been avoided whenever possible.
- ☐ Edge restraint details have been fully coordinated.
Mistake #5: Specifying a Pedestal Brand Without Considering Installation Speed and Labor Cost
Not all pedestal systems install the same way.
To an architect, adjustable pedestals may look like a relatively small part of the overall rooftop patio assembly. But to the contractor installing thousands of them across a rooftop, small differences in pedestal design can have a major impact on labor, scheduling, ordering, and field efficiency.
The pedestal is a small component repeated hundreds or thousands of times. Small installation differences become big labor differences.
That is why pedestal selection should not be based on brand name, product availability, or generic specification language alone.
Installation speed matters.
Labor cost matters.
Ordering simplicity matters.
Field support matters.
Long-term roof access matters.
A pedestal system is not just something that holds pavers at the correct height. It is one of the components that determines how efficiently the rooftop patio can be built and how easily it can be maintained after the project is complete.
The Speed Difference
One of the most overlooked specification decisions is how quickly the pedestal system can actually be installed.
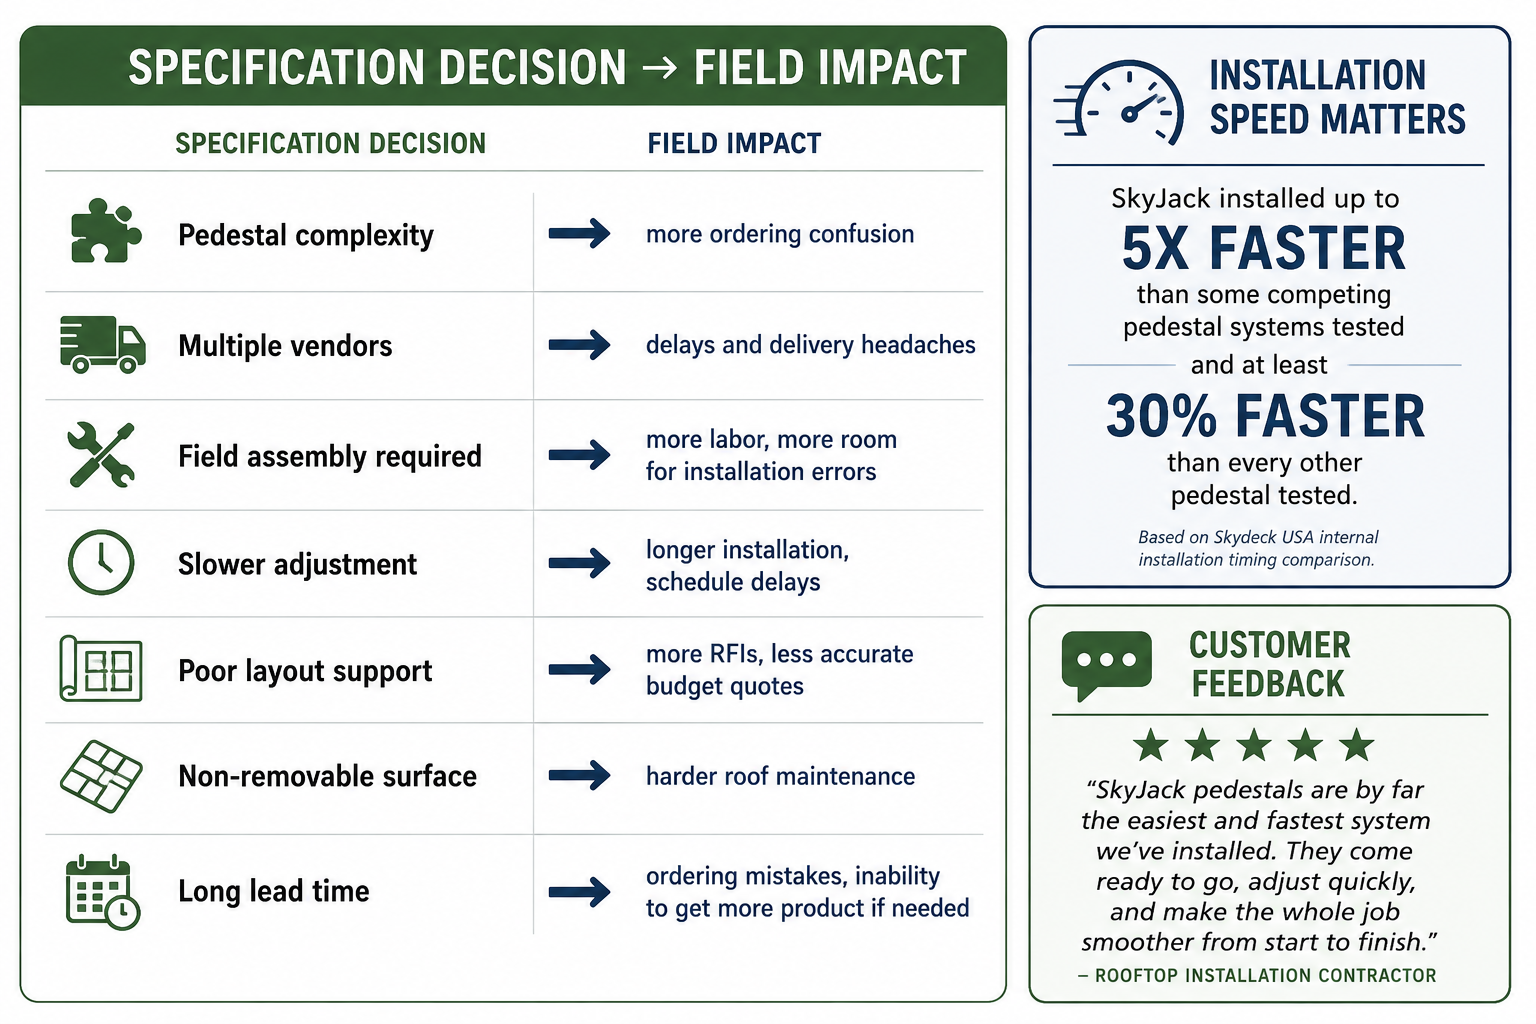
When tested against several major pedestal brands on the market, SkyJack pedestals installed up to 5x faster than some competing systems and no less than 30% faster than every other pedestal tested.
That is not a minor difference.
On a small rooftop, installation speed may save a few hours. On a large commercial amenity deck, it can affect labor budgets, installation sequencing, project schedules, and the number of field adjustments required before the patio is complete.
For architects, this is worth understanding early.
A pedestal may look acceptable in a submittal package, but if it is slower to assemble, harder to adjust, or more complicated to order, those costs eventually show up somewhere — often in labor, RFIs, change orders, or contractor frustration.
The best pedestal specifications do more than identify a product that works.
They identify a system that installs efficiently.
The Simplicity Advantage
Speed is not only about how fast the pedestal adjusts.
It is also about how simple the system is to understand, order, stage, and install.
Some pedestal systems require a large number of separate height ranges, add-on parts like pvc, adapters, or field assembly steps. That can make ordering more complicated and increase the chances that the contractor receives the wrong mix of components.
A simpler pedestal system reduces that friction.
SkyJack pedestals are designed with fewer pedestal sizes, broader adjustment ranges, and fully assembled components to help reduce ordering confusion and save labor in the field.
That simplicity becomes especially valuable on rooftop projects where pedestal heights change across the roof because of slope, crickets, drains, saddles, thresholds, and parapet conditions.
Instead of leaving the contractor to sort through those details during installation, Skydeck USA can help the project team with:
- Estimation assistance
- Pedestal height planning
- Shop drawings
- Paver layout recommendations
- Installation consultation
- Project-specific coordination questions
That kind of support helps architects specify with more confidence and helps contractors install with fewer surprises.
Labor Cost Should Be Part of the Specification Conversation
Architects are not responsible for means and methods, but specification decisions still affect labor.
A system that is slower to adjust, more difficult to level, or harder to coordinate can increase field time. A system that arrives fully assembled, uses fewer parts, and is easy to adjust can reduce unnecessary labor.
That matters because rooftop pedestal projects are rarely installed under perfect conditions.
Installers are working around drains, door thresholds, roof slope, parapet walls, edge conditions, mechanical equipment, and changing weather. The easier the pedestal system is to understand and adjust, the easier it is for the contractor to keep the project moving.
This is why installation speed should not be treated as a contractor-only concern.
It should be part of the architect’s specification conversation from the beginning.
The Roof Access Benefit
A rooftop patio still sits above a roof.
That roof will eventually need inspection, cleaning, service, drain maintenance, or leak investigation. A well-specified pedestal system should preserve that access.
One of the long-term advantages of concrete pavers, porcelain pavers, or deck tiles installed over pedestals is that individual units can be lifted and reset without demolishing the patio.
That matters to building owners.
If a drain plugs five years after installation, maintenance personnel need a practical way to reach it. If a leak appears below the patio, the roof should be accessible for investigation. If rooftop utilities need service, the finished surface should not become a permanent obstacle.
This long-term serviceability is one of the strongest arguments for pedestal-supported rooftop systems, and it should be part of the design conversation.
The goal is not only to create a beautiful rooftop amenity space on opening day.
The goal is to create a rooftop system that remains practical to service for the life of the building.
Skydeck product connection:
SkyJack Adjustable Pedestals are designed to simplify ordering, reduce field assembly, and speed up installation across rooftop paver, porcelain paver, deck tile, turf, and planter applications. When paired with Skydeck USA’s takeoff, shop drawing, layout, and installation guidance, the pedestal system becomes easier to specify and easier to build.
Avoid the RFI
Common Question from Contractors
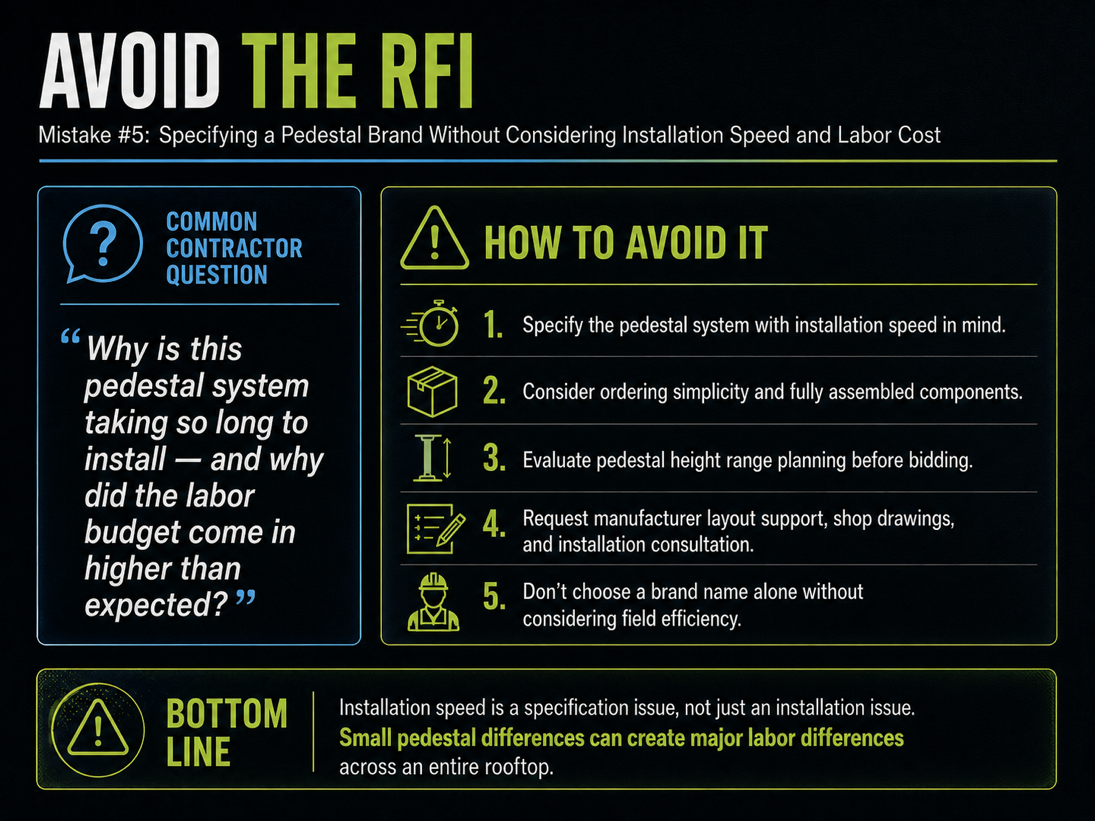
“Why is this pedestal system taking so long to install — and why did the labor budget come in higher than expected?”
How to Avoid It
Specify the pedestal system with installation speed, ordering simplicity, preassembled components, height range planning, and manufacturer layout support in mind — not brand name alone. Request product information that helps the contractor understand how the pedestal adjusts, how many sizes are required, whether components arrive fully assembled, and what layout or installation support is available before construction begins.
Lessons We’ve Learned from the Field
One of the biggest lessons we have learned is that labor efficiency starts before the installer ever arrives on the roof.
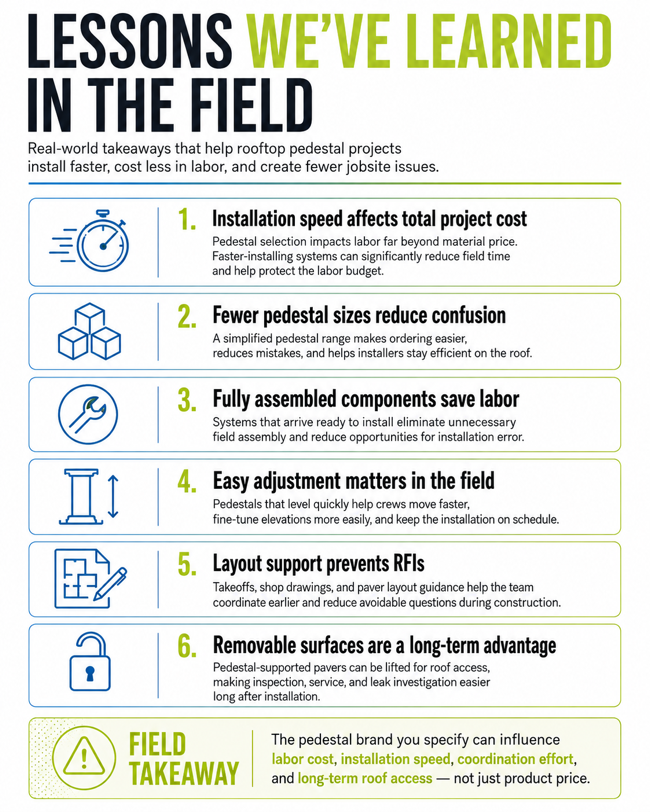
It starts with the specification.
When lead times are long, pedestal systems are difficult to order, slow to assemble, confusing to adjust, or require materials from multiple vendors, contractors spend more time solving problems than installing pavers.
When the system is simple, fast, well-supported, and comes from a single rooftop patio materials manufacturer, the entire process from design to installation moves more smoothly.
We have seen projects where a better pedestal layout, clearer height planning, or simpler adjustment system made a meaningful difference in the field. We have also seen projects where unclear specifications left contractors comparing systems that were not equal from a labor standpoint.
The pedestal is a small component, but it is repeated across the entire rooftop.
That repetition magnifies everything.
A few extra minutes per pedestal may not sound like much until it is multiplied across hundreds or thousands of supports.
For architects, the takeaway is simple: specify the system that helps the contractor build the project efficiently and helps the owner maintain it long after installation.
Architect’s Design Checklist
Before finalizing the pedestal specification, confirm the following:
- ☐ The pedestal system has been evaluated for installation speed and labor impact.
- ☐ The pedestal height ranges are simple enough to order, stage, and install efficiently.
- ☐ Pedestals arrive fully assembled or require minimal field assembly.
- ☐ The manufacturer can provide estimation assistance before bidding.
- ☐ Shop drawings or layout support are available when needed.
- ☐ Paver layout recommendations have been coordinated with the pedestal system.
- ☐ Installation consultation is available for the contractor.
- ☐ The finished system allows individual pavers or tiles to be removed for roof access.
- ☐ Drain access, roof inspection, and future leak investigation have been considered.
- ☐ The specification accounts for both first-cost installation efficiency and long-term serviceability.
What Should Be Included in a Rooftop Pedestal System Specification?
A rooftop pedestal system specification should identify:
- Finish material type, size, thickness, weight, color, and layout pattern
- Pedestal system type and height ranges
- Drain locations and roof access requirements
- Finished patio elevations
- Door threshold elevations
- Roof slope and drainage direction
- Parapet, wall, curb, and edge termination conditions
- Wind uplift requirements where applicable
- Required submittals, shop drawings, product data, and installation guidance
Frequently Asked Questions About Rooftop Pedestal Systems
What is a rooftop pedestal system?
A rooftop pedestal system is an elevated rooftop surface assembly that uses adjustable or stackable pedestals to support pavers, deck tiles, turf systems, or other walking surfaces above a roofing membrane. The pedestal system creates a level finished patio surface while allowing the roof below to continue draining as designed.
What are the biggest mistakes architects make when specifying rooftop pedestal systems?
The biggest mistakes architects make when specifying rooftop pedestal systems are failing to understand the roof before selecting materials, ignoring drainage and water management, leaving pedestal height planning until construction, failing to address wind uplift requirements during design, and choosing a pedestal brand without considering installation speed, labor cost, and long-term roof access.
Can rooftop pavers be installed over a roofing membrane?
Yes. Rooftop pavers can be installed over a roofing membrane when they are supported by a properly designed pedestal system. The roofing membrane remains the waterproofing layer, while the pavers create the finished walking surface above it. The system should allow water to pass through the paver joints and drain across the membrane below.
Does a rooftop pedestal system affect roof drainage?
A properly designed rooftop pedestal system should not interfere with roof drainage. Water should pass through the joints between pavers, flow across the roofing membrane below, and continue toward the roof drains exactly as the roofing system was designed. The pedestal system should not block drainage paths or trap water beneath the finished surface.
Why is drainage important when designing a rooftop patio?
Drainage is critical because the roof is designed to shed water toward roof drains. If a rooftop patio blocks drainage, redirects water, or traps water beneath the finished surface, it can contribute to standing water, debris buildup, clogged drains, membrane deterioration, and long-term maintenance problems.
Should roof drains remain accessible after pavers are installed?
Yes. Roof drains should remain accessible for inspection, cleaning, and maintenance after the rooftop patio is installed. One advantage of pedestal-supported paver systems is that individual pavers can often be removed to access drains or inspect the roofing membrane without demolishing the patio.
Why are pedestal heights important on rooftop patio projects?
Pedestal heights are important because rooftop surfaces are sloped for drainage while the finished patio surface is usually intended to be level. Pedestal heights may change across the roof because of slope, drains, crickets, saddles, thresholds, parapets, roof edges, and elevation changes. These conditions should be reviewed during design instead of left for the installer to solve in the field.
When should pedestal heights be planned?
Pedestal heights should be planned during the design phase, before bidding and construction. Finished patio elevations, door thresholds, roof slope, drain locations, crickets, saddles, parapets, and edge conditions should be reviewed early so the correct pedestal height ranges can be estimated and specified.
What drawings help reduce RFIs on rooftop pedestal projects?
Section drawings and elevation drawings are especially helpful. Plan views show where rooftop features are located, but sections and elevations show how the roof, pedestals, finished patio surface, thresholds, drains, parapets, and elevation changes relate vertically. Clear section drawings can reduce RFIs by communicating the architect’s design intent before construction begins.
Do rooftop pedestal systems need wind uplift restraint?
Some rooftop pedestal systems require wind uplift restraint, especially near roof edges and corners where uplift pressures are often higher. Whether restraint is required depends on building height, location, exposure category, roof geometry, parapet height, distance from roof edges, and the type of surface material being installed.
When should wind uplift requirements be addressed?
Wind uplift requirements should be addressed during design, not after construction begins. The design team should identify applicable roof zones, restraint requirements, edge conditions, roofing warranty considerations, and engineering responsibilities before bidding whenever possible.
Are concrete pavers better for wind uplift than lighter rooftop materials?
Concrete pavers provide more dead load than lighter materials such as porcelain pavers, Ipe deck tiles, or turf systems. That added weight may help in some rooftop conditions, but wind uplift requirements still depend on the specific building, roof zones, exposure, parapet height, and engineering requirements. Lighter materials often require additional wind restraint review.
Should pedestal systems be fastened through the roofing membrane?
Roof penetrations should generally be avoided whenever possible because they can create future leak risks, increase maintenance concerns, and affect roofing warranties. Rooftop pedestal and wind restraint strategies should be coordinated to protect the waterproofing system while meeting project requirements.
Why does installation speed matter when specifying a pedestal system?
Installation speed matters because pedestal systems are repeated across an entire rooftop. Small differences in pedestal design, adjustment speed, field assembly, and ordering simplicity can become major differences in labor cost, schedule, and contractor efficiency when multiplied across hundreds or thousands of pedestals.
How can pedestal selection affect labor cost?
Pedestal selection can affect labor cost by changing how quickly installers can set, adjust, level, and coordinate the system in the field. Systems that require more parts, more field assembly, more complicated height ranges, or slower adjustment can increase installation time. Simpler systems with broader height ranges and fewer field assembly steps can help reduce unnecessary labor.
What should architects consider before choosing a pedestal brand?
Architects should consider more than the pedestal brand name. They should evaluate installation speed, height range simplicity, field assembly requirements, ordering complexity, availability, layout support, shop drawing assistance, wind uplift options, roof access, and long-term maintenance needs.
What information should be included in a rooftop pedestal system specification?
A rooftop pedestal system specification should identify the surface material, pedestal system, pedestal height ranges, roof protection requirements, drainage requirements, finished patio elevations, door threshold conditions, roof drain access, wind uplift requirements, edge conditions, required submittals, and any shop drawing or layout requirements.
What roof information should be reviewed before selecting a rooftop patio system?
Before selecting a rooftop patio system, the design team should review roof load capacity, membrane type, roof assembly, insulation thickness and compressive strength, tapered insulation layout, slopes, drains, crickets, saddles, expansion joints, door thresholds, parapets, rooftop equipment, maintenance access, and environmental conditions such as wind, snow, and freeze-thaw exposure.
How much door threshold height is needed for a rooftop patio?
Threshold height should be coordinated with the roofing and waterproofing design. The draft article recommends that door thresholds provide adequate vertical space for proper waterproofing membrane termination, ideally 8 inches, with 4 inches minimum whenever practical. Low thresholds can make it harder for the roofing contractor to properly extend and terminate the waterproofing membrane.
Why should rooftop pavers be removable?
Rooftop pavers should be removable because the roof below may eventually need inspection, drain cleaning, leak investigation, membrane repair, or utility service. A removable pedestal-supported surface allows individual pavers or tiles to be lifted and reset without demolishing the finished patio.
What is the advantage of pedestal-supported pavers compared with poured concrete on a roof?
Pedestal-supported pavers allow water to drain through the finished surface and across the roofing membrane below. They also preserve access to drains and the membrane. Poured concrete over a roofing membrane can interfere with drainage, complicate leak investigation, and may affect roofing warranty coverage.
What is the advantage of pedestal systems compared with joists placed directly on the roof?
Joists placed directly on the roofing membrane can act like small dams that trap water and debris. Properly supported pedestal framing or paver systems elevate the finished surface so water can continue flowing across the membrane toward the drains.
What materials can be used with rooftop pedestal systems?
Rooftop pedestal systems can support multiple surface options, including concrete pavers, porcelain pavers, Ipe deck tiles, and turf systems. The best option depends on structural load capacity, wind requirements, design intent, drainage, maintenance access, and project-specific conditions.
How can architects reduce RFIs on rooftop pedestal projects?
Architects can reduce RFIs by confirming roof load capacity early, coordinating drainage, planning pedestal heights during design, showing roof zones and wind restraint requirements, including section and elevation drawings, maintaining roof drain access, coordinating edge conditions, and specifying a pedestal system with clear product information, layout support, and installation guidance.
Conclusion: Better Specifications Start With Better Information
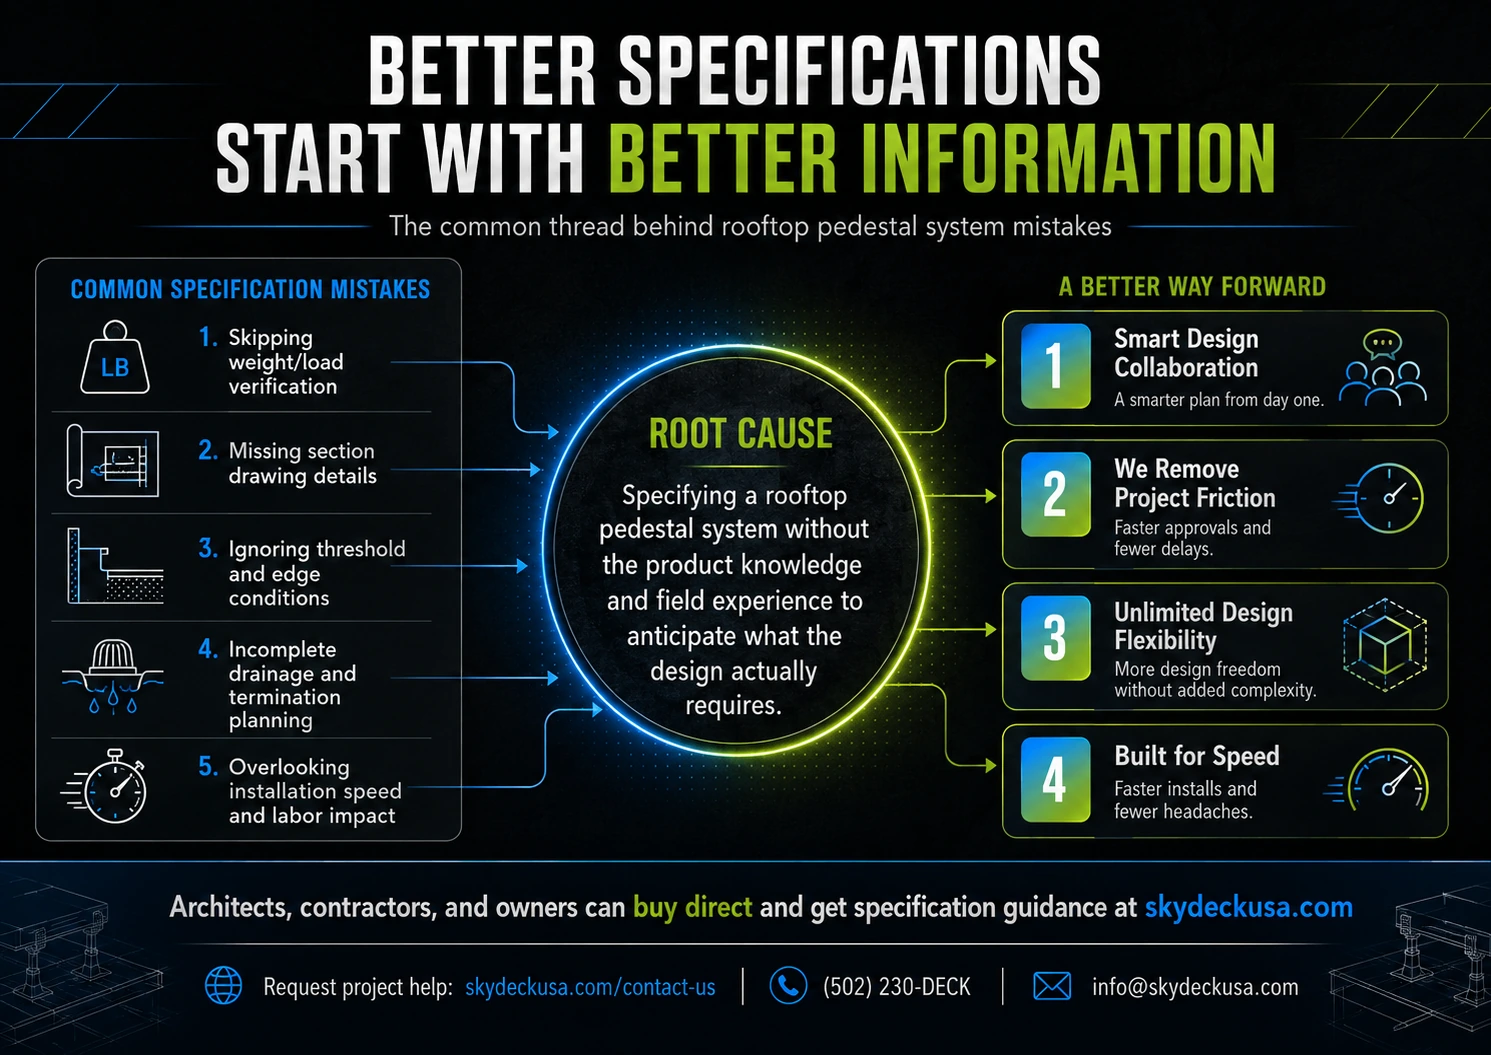
Rooftop pedestal systems do not have to be difficult to specify.
Most project problems begin when important information is missing early in the design process.
The roof load capacity was not confirmed.
The roof slope and drainage strategy were not fully understood.
Pedestal heights were left for the installer to figure out.
Wind uplift requirements were not addressed until construction.
Installation speed and long-term roof access were not considered during product selection.
Each mistake may look different on paper, but they all point back to the same root cause:
A rooftop pedestal system was specified without enough product knowledge, field experience, or project-specific information to anticipate what the design actually required.
That is why better rooftop specifications start with better questions.
What does the roof need?
How will water drain?
How tall will the pedestals be?
What loads can the structure support?
How will the system perform in wind?
How quickly can it be installed?
How will the roof remain accessible years after the patio is complete?
When those questions are answered early, rooftop patio projects become easier to design, easier to approve, easier to price, easier to install, and easier to maintain.
How SkyDeck USA Helps
At SkyDeck USA, we help project teams move from early rooftop concepts to buildable rooftop patio systems by combining product knowledge, field experience, and practical specification guidance.
Our proven process is designed to remove uncertainty before it becomes an RFI, delay, change order, or field problem.
1. Smart Design Collaboration
We ask the right questions early and apply rooftop expertise to help prevent costly mistakes.
Before recommending a system, we work to understand the roof, structure, drainage, finished elevations, threshold conditions, wind considerations, and design intent.
Result: A smarter plan from day one.
2. We Remove Project Friction
Rooftop patio projects often slow down because important details are unclear, incomplete, or left for the wrong trade to figure out later.
SkyDeck USA helps handle the details that often create friction, including product approvals and substitutions, complete submittal packages, accurate takeoffs, buildable shop drawings, ordering, and project coordination.
Result: Faster approvals and fewer delays.
3. Unlimited Design Flexibility. One Coordinated System.
Rooftop amenity spaces should not force architects into one surface type or one design approach.
SkyDeck USA’s integrated rooftop systems support multiple finish options, including concrete pavers, porcelain pavers, Ipe deck tiles, and turf systems, while simplifying specification and construction.
Result: More design freedom without added complexity.
4. Built for Speed. Supported Through Completion.
A rooftop system should not only look good on paper. It should install efficiently in the field.
SkyDeck USA systems are designed for faster installation, simpler training, fewer field issues, jobsite support, and fast answers when questions come up.
Result: Faster installs, fewer headaches, and successful projects.
Ready to Start a Rooftop Patio Project?
Architects, general contractors, subcontractors, and homeowners can buy directly from SkyDeck USA and access full specification guidance at skydeckusa.com.
To submit a project inquiry or request specification assistance, visit:
Or contact Skydeck USA directly:
(502) 230-DECK
info@skydeckusa.com
Monday-Friday, 9:00am-5:00pm EST
A better rooftop patio starts long before installation.
It starts with better information, better coordination, and a system designed to make rooftop projects easier from design through completion.
Skydeck USA Rooftop System Solutions
Skydeck USA provides coordinated rooftop patio system components designed to help architects, contractors, and building owners create rooftop spaces that are easier to specify, easier to install, and easier to maintain.
SkyJack Adjustable Pedestals
SkyJack Adjustable Pedestals support elevated rooftop paver, tile, turf, planter, and deck tile assemblies while helping create a level finished surface above a sloped roofing system.
View SkyJack adjustable pedestals for rooftop paver systems
SkyWalk Concrete Paver Pedestal System
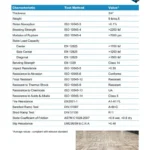
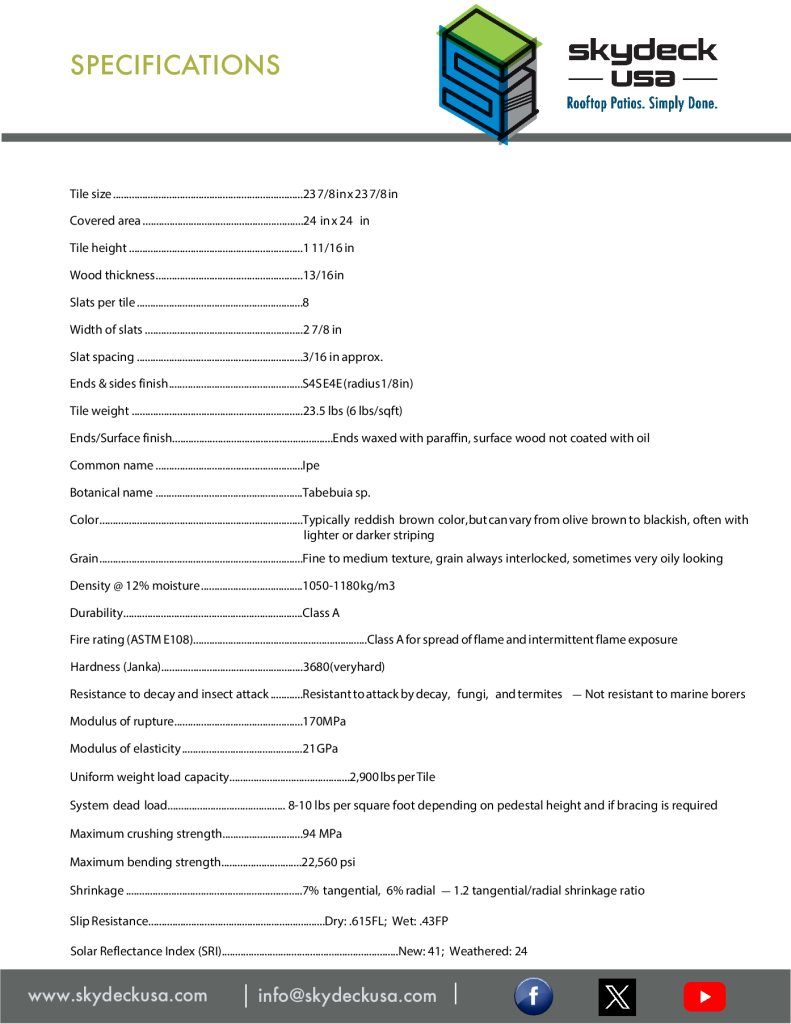
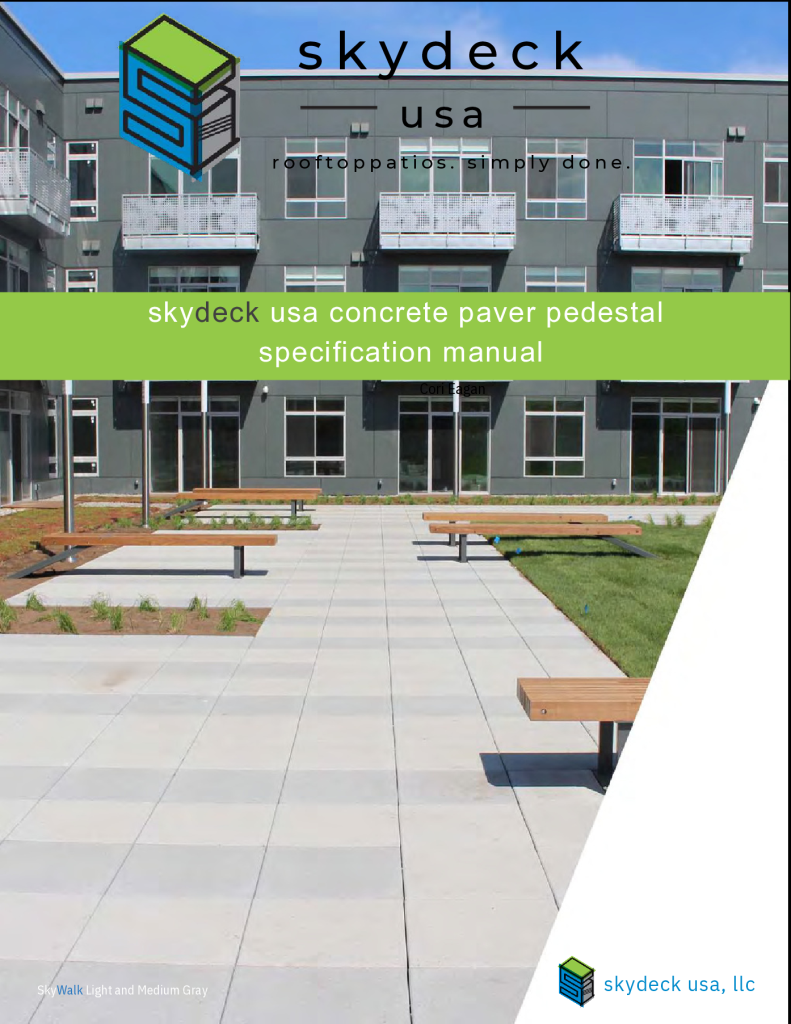
SkyWalk Concrete Pavers are rooftop pavers designed for SkyJack pedestal-supported applications where durability, appearance, roof access, and long-term performance are important. Sizes start at 12” x 12” x 1.5” thick. View our SkyWalk Concrete Paver Pedestal Specification Guide here.
WindStrong Paver Restraint System
WindStrong Paver Restraint System provides wind uplift restraint for the SkyWalk Concrete Paver Pedestal System when project conditions require additional wind resistance. Download specification guide for the WindStrong paver restraint system.
SkyHeights Pedestal Reinforcement System
SkyHeights Pedestal Reinforcement System provides lateral bracing for taller rooftop pedestal assemblies over 21.75” that require additional stability. View the SkyHeights detail drawing from Skydeck USA.
SkyWalk Turf Grate System
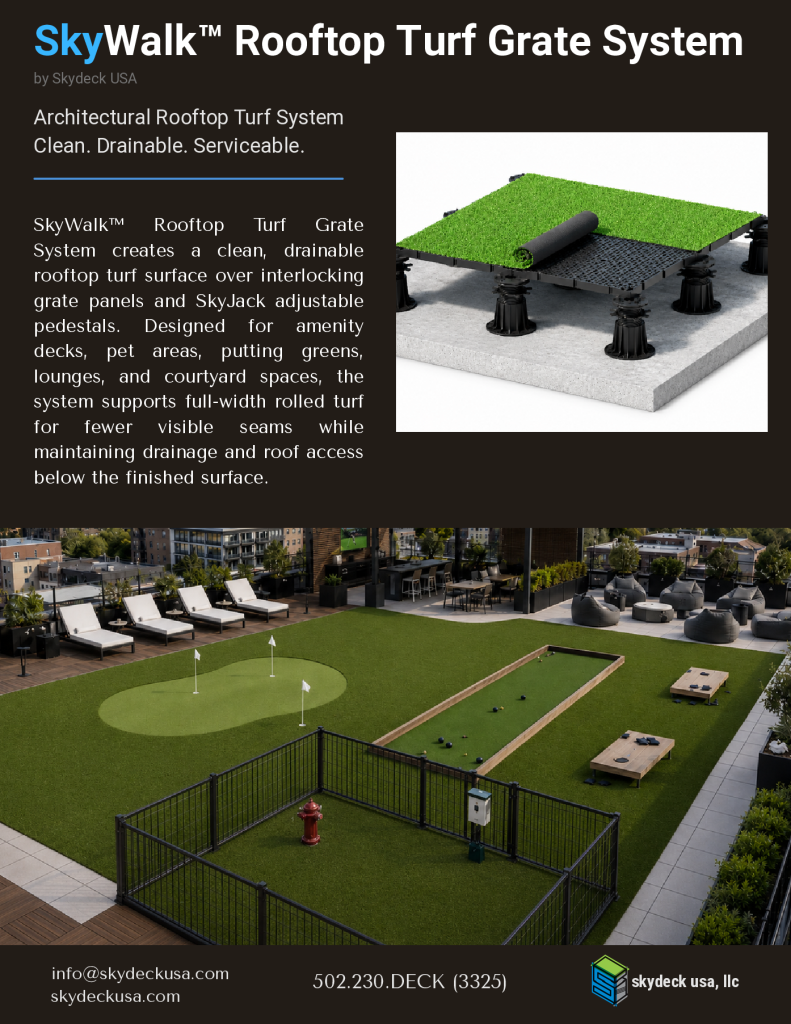
SkyWalk Turf Grate System supports rolled synthetic turf over elevated rooftop grate assemblies, allowing turf areas to be incorporated into pedestal-supported rooftop patio designs. View the SkyWalk Turf Grate System brochure.
SkyWalk Porcelain Paver Pedestal System
SkyWalk Porcelain Paver Pedestal System includes 2cm thick porcelain pavers that are made to sit on pedestals. Safety backing should be added on pedestals 4” or taller. Browse the wide variety of porcelain paver colors offered by Skydeck USA.
SkyWalk Porcelain Paver Safety Backing
SkyWalk Porcelain Paver Safety Backing is a thin fiberglass mesh that we factory apply to the back of any brand of porcelain paver. This backing provides fall protection and eliminates the need for a grate or tray system underneath the porcelain pavers. Check out more information on adding safety backing on your next porcelain paver project.
SkyWalk Ipe Wood Deck Tile on Pedestals System
SkyWalk Ipe Wood Deck Tiles are highly durable, class-A fire rated wood tiles that are fabricated to sit directly on SkyJack pedestals for rooftop patios. These wood tiles are left untreated as a natural wood product which highlights the beauty and diversity of Ipe (“ee-pay) wood. Find out how Ipe wood tiles may fit into your next rooftop patio design.
Skydeck USA Specification Guidance
Skydeck USA has specification guides for each flooring system. These guides provides a step-by-step guide for specifiers to understand the system and know how to specify it for their specific project. It includes product options, detail drawings and a specification checklist to help make specifying quick, easy and remove uncertainty.